I am trying to simulate a BIPV (Building Integrated PV) structure in Ladybug, but I am running into some discrepancies.It seems that shading is not taken into account by the “Ladybug_Potovoltaics Surface” component. In the image below you can see the “Ladybug_Radation Analysis” results, where it’s visible that the lowest horizontal surface receives a lot less radiation than the top one, but when I check the “ACenergyPerHour” output of these surfaces provided by “Ladybug_Potovoltaics Surface” both of these elements generate identical amount of energy. How can I incorporate shading into “Ladybug_Potovoltaics Surface” simulation results?

Hi @PotatoeBob,
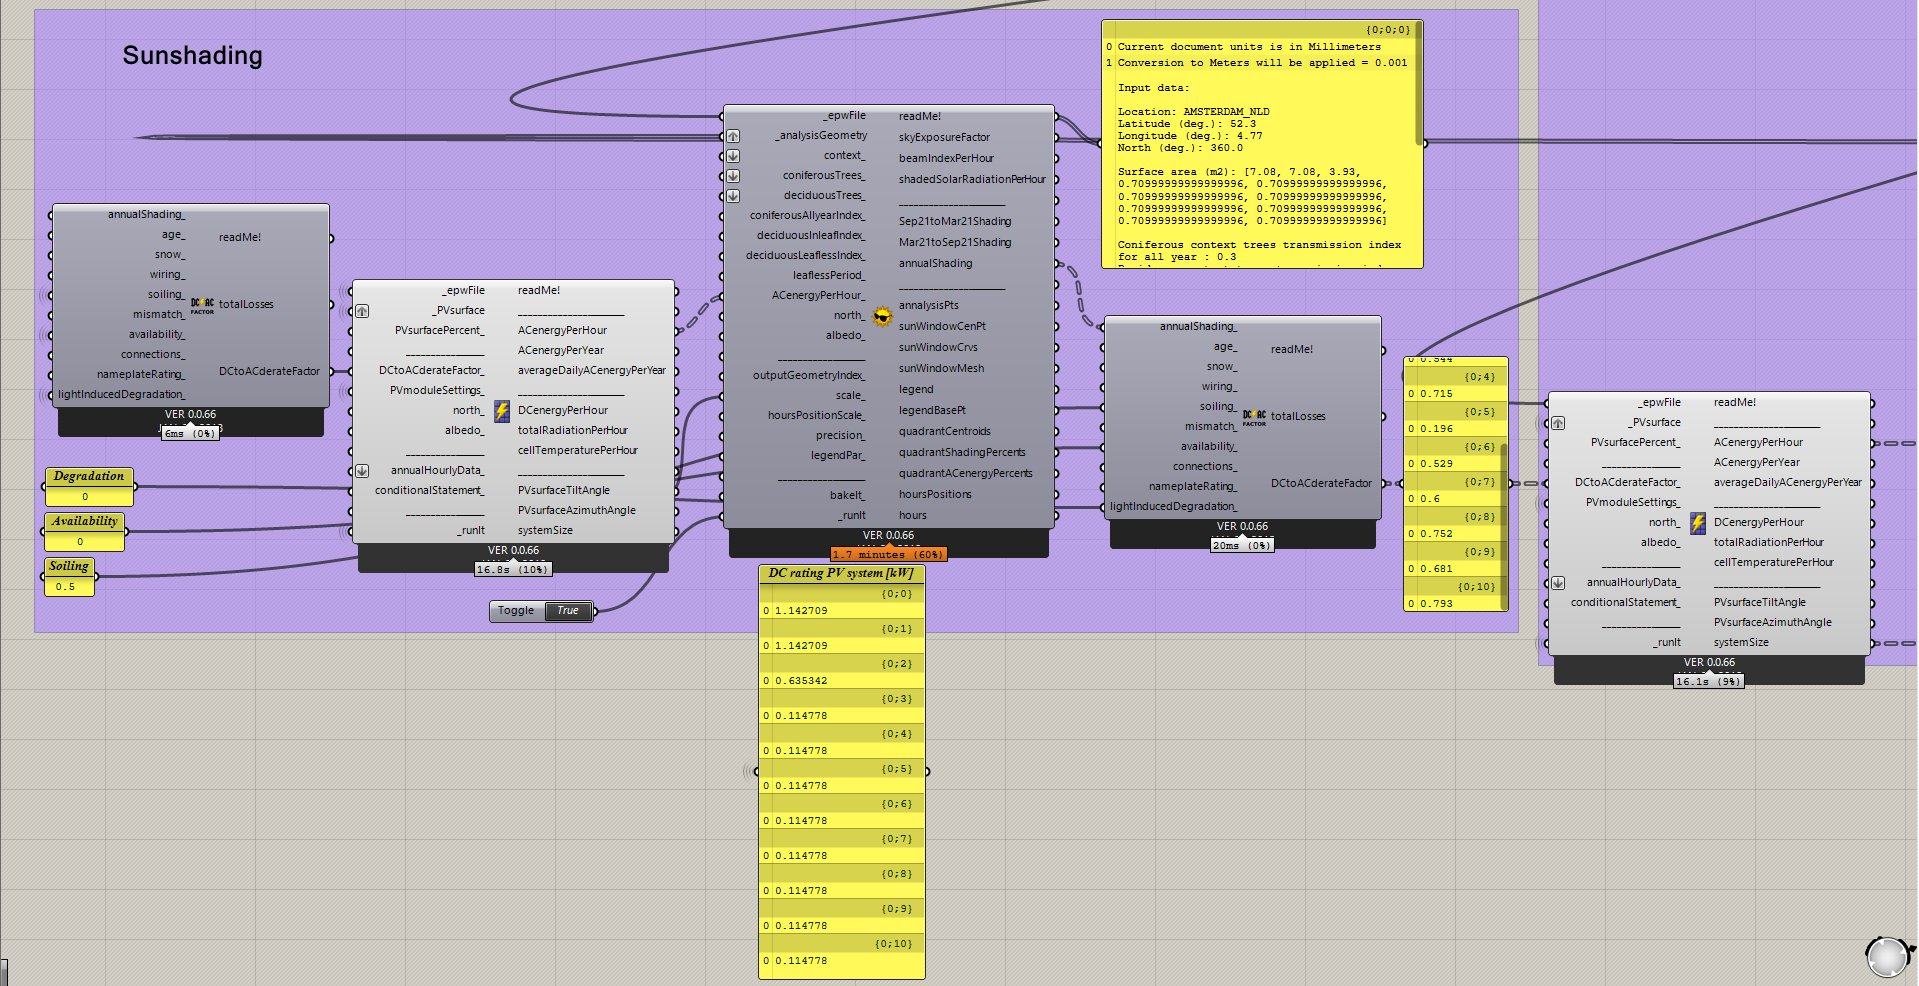
Ladybug Photovoltaics components are based on NREL model, where system losses are defined through “DCtoACderateFactor_” input. This input is defined through "“DCtoACderateFactor” component. One of the inputs of that component is “annualShading_”. This input is defined through “SunPath Shading” component.
So basically whenever you just use the “Photovoltaics Surface” component, you are analysing with 0.0 percent of shading.
To include the shading into calculation upper mentioned two components need to be used.
Look at the example file “020_Photovoltaics shaded analysis.gh” in this page.
1 Like
Connecting the “DCtoACderateFactor” into “Ladybug_Potovoltaics Surface” generates a “Reclusive data stream” error. I imagine this is because the “ACenergyPerHour” from “Ladybug_Potovoltaics Surface” has to be fed into the “Ladybug_SunPath Shading” and so that creates a loop.
Should I “air gap” the “DCtoACderateFactor” data coming from “Ladybug_DC to AC derate factor” or I am missing something?

Hi @PotatoeBob,
Strangely I haven’t received any email about your latest post.
@devang is it somehow possible to get the email notice once the user replies to a topic, to which I am invited to (like this one), without the user tagging me in his reply?
Bob, for future replies, if you tag the name of a user, he will definitively receive an email, the way you will now now.
You need to add another “DCtoACderateFactor” component at the end.
Check the attached file. Run all the boolean toggles grouped in red color.
020_Photovoltaics shaded analysis.gh (510.6 KB)
1 Like
Thanks @djordje ,
The simulation works like a charm. It did not even occur to me to use the “Ladybug_Potovoltaics Surface” component twice to break the loop.
Glad we helped @PotatoeBob !
The reason for using two times Photovoltaics and DCtoACderateFactor components is because it is impossible to calculate the annual shading without knowing how much each portion of the sunpath diagram contributes to the generated AC energy.
So, first we perform the analysis with 0 shading, to get the grasp of how much each sunpath diagram part generates AC energy. Then based on this data, and by using _context inputs, we can calculate the annualShading, which then needs to be used to correct the unshaded analysis results.
If you have any other questions, please let us know.
Hi @djordje
Does the DCtoACderateFactor calculate losses twice then? If the first run for the DCtoACderateFactor is only to calculate the AC energy per hour from the sun path surely that could be run with a derate factor of 1 through a panel input?
The reason this comes up is I’ve been comparing the Ladybug PV component with PVSyst, with exactly the same model and input assuming that Ladybug shading is running a linear shading algorithm and there is something very surprising with the shading going on.
Hi @snjsomnath,
You can try with derate factor “1” as well. You will see that the results are the same, or very small (less than 1%).
I am not familiar with PVSyst. It can be that regardless of the same initial system setting it is using a different calculation model. Ladybug PV components are using PVWatts NREL model.
Another difference that may be is that: PVSyst is using an hourly shading, unlike Ladybug PV.
Thanks for the reply @djordje
You are right about the derate factor.
I have a confusion regarding the self-shading aspect of the " Sunpath Shading" tool.
From the tool-tip for the analysis geometry, it mentions “Geometry inputted to “analysisGeometry", will be accounted for self-shading, so there is no need to input it to the "context” also.”
but again in the tool-tip for the context geometry, it mentions “If you supplied surface(s) to the “analysisGeometry", input them into the "context” too, to account for self-shading”
Does this only apply for “Points” that have been input into the analysis geometry of for all surfaces?
I did read on another forum post on a similar topic by Mostapha
“Ladybug always runs self-intersections for test geometries. In other words, you should not connect the test geometries to context, and it has been the same from the first release of Ladybug.”
Am I misunderstanding the tool-tip?
Hi @snjsomnath,
It seems that “context_” input description is an old one, I forgot to remove it.
Just disregard this part:
If you supplied surface(s) to the “analysisGeometry", input them into the "context” too, to account for self-shading.
If you inputted point(s) into the “analysisGeometry", there’s no need to input them into the "context”.
So, you are correct: when the surface is added to the “_analysisGeometry” input, it is automatically accounted for self-shading. There is no need to add it to the “_context” input.
Although I think that even if you did that, there would not be any change in the results (as the code already added the surface to the “context_”).