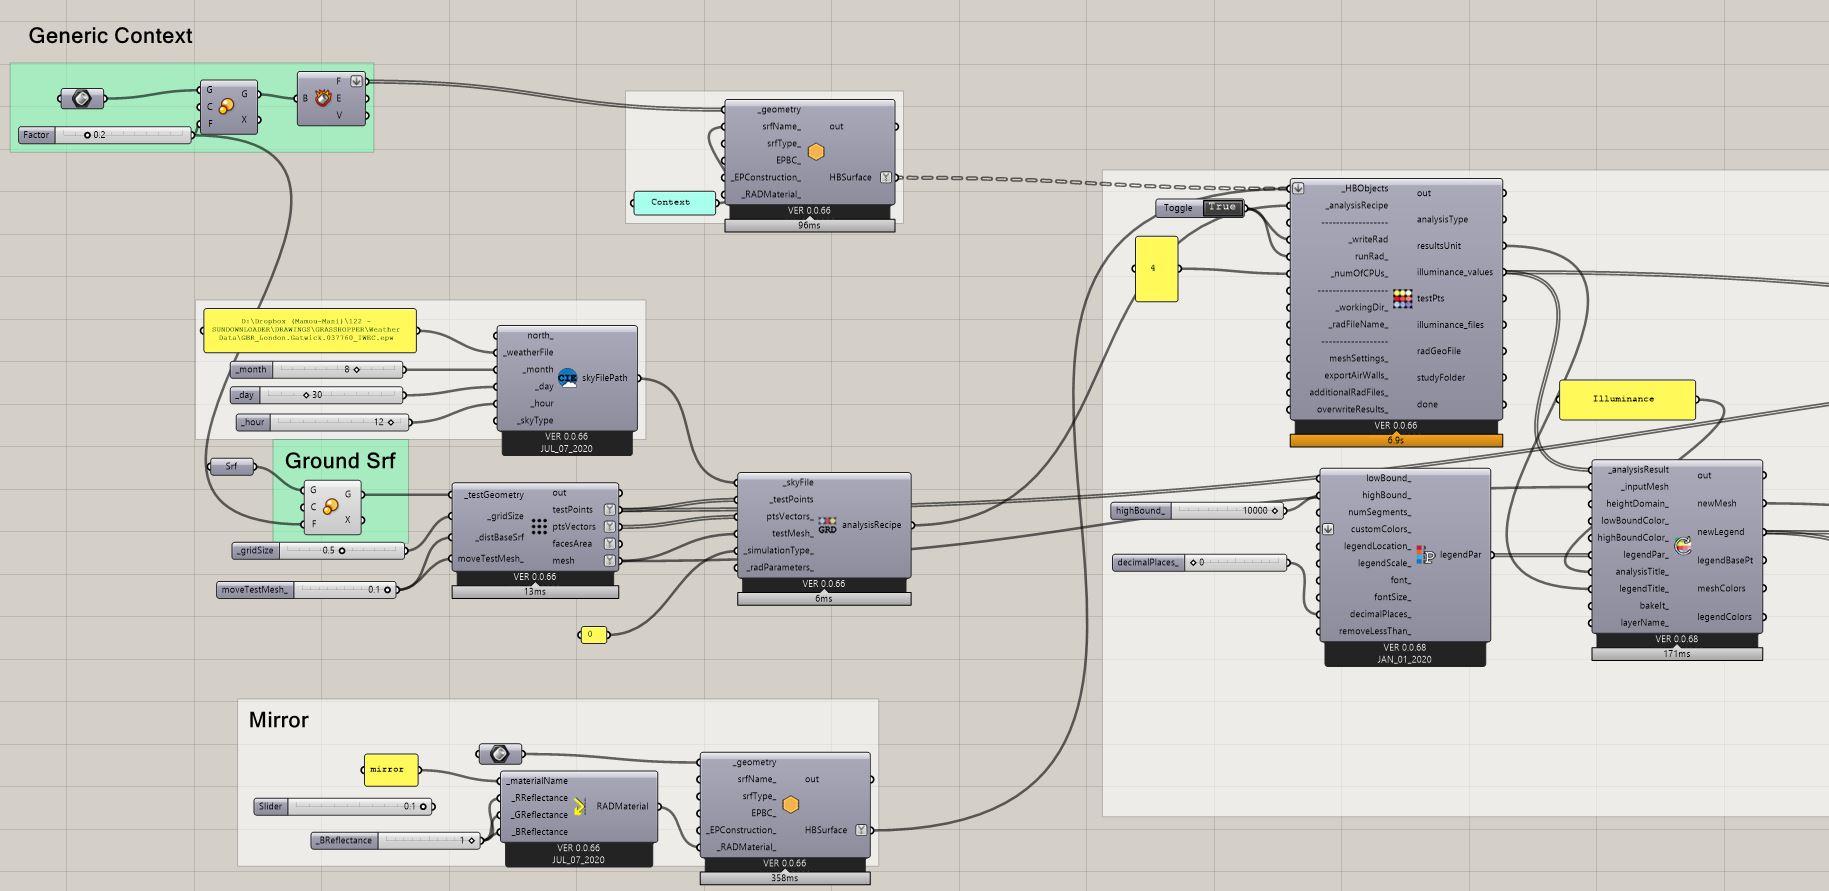
I am trying to use honeybee daylight simulation tool to get the illumiance landing on a surface from sunlight, but also taking into account the reflection from a mirror surface (sphere) I’ve placed above the surface.
So far, the mirror surface works in blocking some amount of sunlight, but the reflection doesn’t seem to bring more illuminance to the dark area. I’m wondering what I did wrong in my setup if anyone can help.
Hi @Carmen, Welcome to the forum. Can you share a sample script to test?
For starters Mirror material should only be applied to planar faces and you should make sure the normal of those faces are facing outwards. I would double check the seen first with an image-based recipe to make sure the geometry and materials are assigned correctly and then try to run the grid-based study.
Thanks, @mostapha, see my file here.
Is there a to apply mirror material on a curved surface though?
illuminance.gh (69.9 KB)
No. See here for more information: The RADIANCE 5.1 Synthetic Imaging System
[…] This material is only supported for flat surfaces such as polygons and rings.
Dear @mostapha ,
I´m facing a similar issue with a spherical convex mirror shape. In the past, I´ve been able to deconstruct such shapes into polygons using trimesh. This has allowed me to get more rays density and accuracy with Ladybug´s ray tracing to understand how light could be reflected from these surfaces. However, when it comes to grid-based illuminance simulations or radiance renderings the reflections from the mirror are incomplete regardless of how much I deconstruct the smooth shape into smaller polygons (I´ve tried with both Ladybug + Honeybee and Climate Studio) Is there any workaround you are aware of?
Thanks in advance,
Daniel
@Dlagol ,
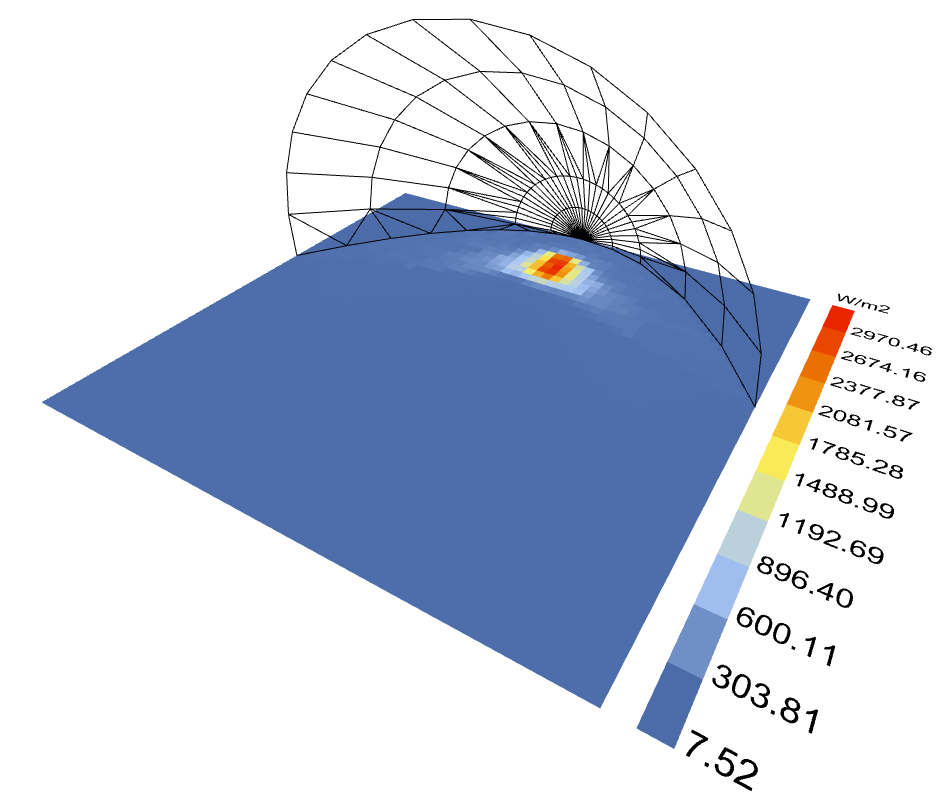
You are likely not using the right type of modifier if you want to study the concentration of light. You would have to use a Mirror Modifier if you want to see concentration of direct sun and you should be prepared to wait a very long time if you have subdivided you mirror into lots of little smaller pieces for the study. I would recommend planarizing your geometry very coarsely at first just so you’re not waiting an eternity for the result. Radiance has to perform a separate direct-beam calculation for each facet of your mirror geometry so this is why it will take some time.
Hi Chris,
thank you for your fast response. I apologize, I should have given more information before. I´m using the Mirror Modifier, for a mirror surface 98% reflective:
void mirror mirror1
0
0
3 0.980 0.980 0.980
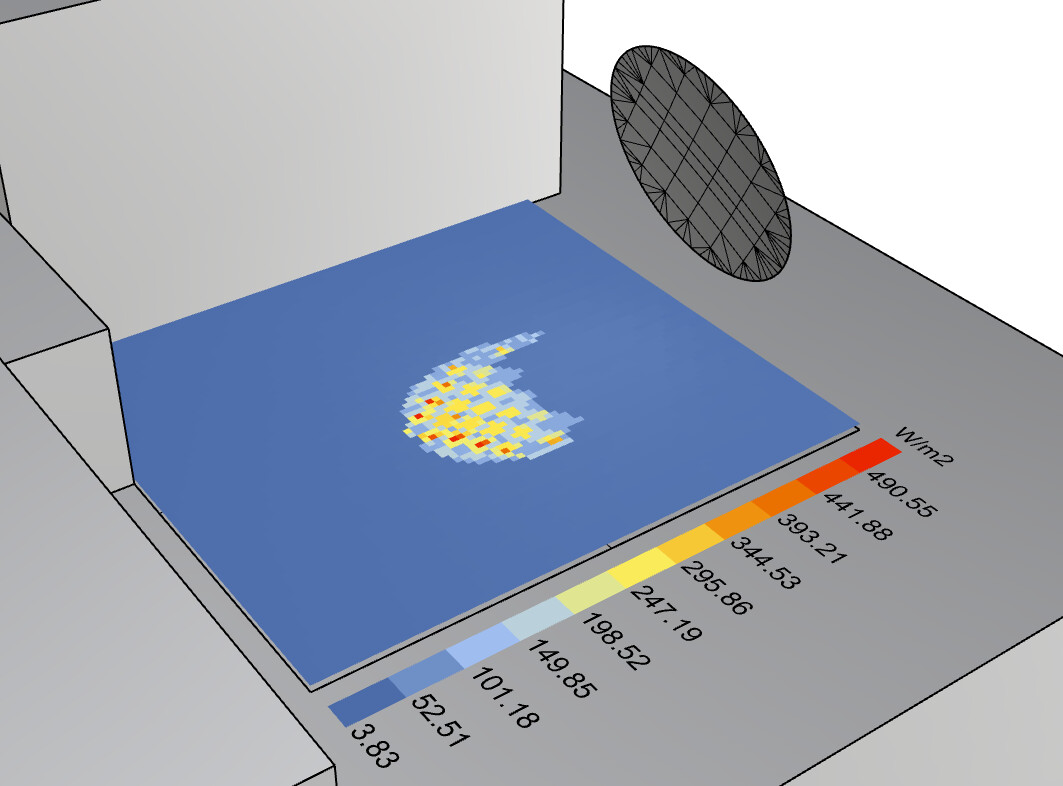
This works fine with a square, flat mirror. However, even after subdividing the geometry (still flat, not even convex at this point), I keep getting these results. (please see attached)

Ideally what I would want is the opposite to concentrating light, rather spread it with a slightly convex mirror.
I´ve tried with higher accuracy for -dr -ab -aa -lw so far with no luck.
Thanks in advance for any other hints!
Best regards,
Daniel
Hi @Dlagol,
Are you able to share a Rhino/Grasshopper that produces the results in your image?
1 Like
I sense the answer is somewhere in your choice of Radiance parameters. @mikkel 's an expert on this and I’m sure he could provide some insight if you can upload a sample of what created your screenshot above.
1 Like
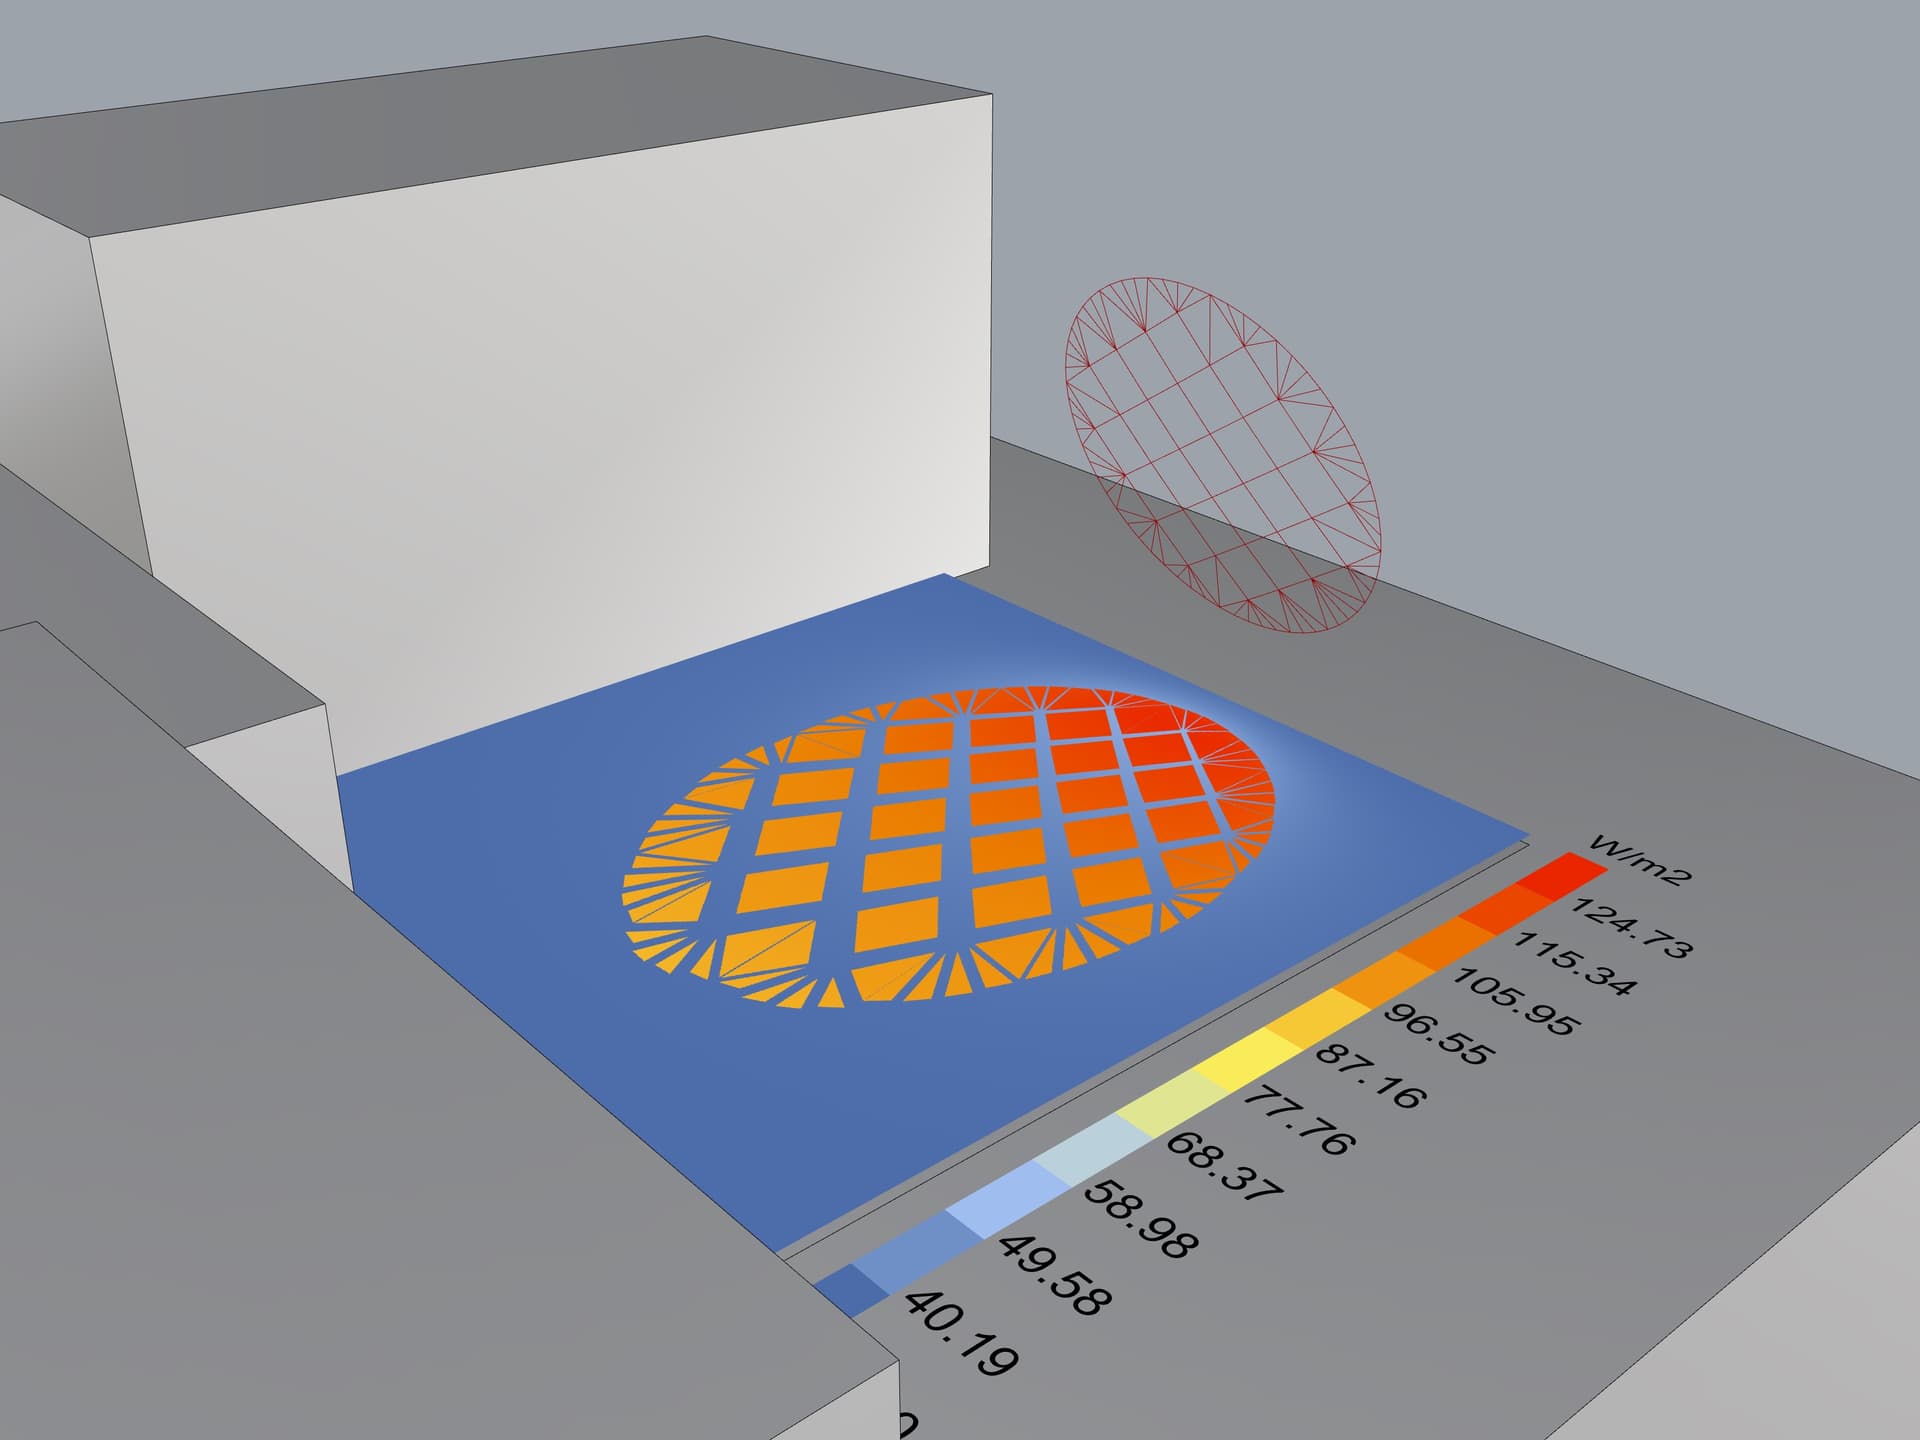
FYI, I just did a quick test with the mirror material, coarse meshing, and relatively simple Radiance parameters. I don’t have any issues with seeing the concentration effect of the mirror in the results:
test_mirror_focus.gh (55.0 KB)
1 Like
thank you both for your replies. Apologies for the delayed response from my side.
Please find attached the Rhino test model with the convex mirror geometry and the gh definition used before for testing. The location used before was Athens.
230817_convex_mirror_test_model.3dm (78.7 KB)
230817_illuminance.gh (510.8 KB)
It would be great if you find the time to have a look ![]()
Maybe I should implement a coarse meshing as you both have mentioned. Will try that in the meantime!
Many thanks,
Hi @chris,
I gave it a try using your definition and planarizing the geometry. Still getting odd results. It´s quite clear from the resulting images light is not being reflected from areas close to the individual planarized geometries edges.
I used a super fine analysis grid with 0.005m spacing between sensors.
Any thoughts?
Best,
Daniel Lago
Hi @Dlagol ,
Your mirror is convex from the perspective of your sensor grid. Not concave. So it’s spreading the the solar energy out instead of concentrating it. If I rotate it around, I can see some concentration starting to happen:
230817_convex_mirror_test_model_CWM.3dm (221.2 KB)
test_mirror_focus_CWM.gh (65.1 KB)
If you make the meshing parameters finer, you’ll start to get a smoother result.
Hi @chris ,
thanks for this.
However, I think I wasn´t clear enough before. The intention is to use the convex side of the mirror to spread light slightly (as in comparison to a specular reflection from a flat mirror) So basically the opposite of concentrating the solar energy. I apologize if this wasn´t clear before.
I did some further testing, modifying the -dr value from 0 (no rays traced for specular reflections) up to 16 which should be fairly accurate. With -dr 0 the results were quite smooth but not realistic. With the higher values, the weird dark blue patterns appeared again.
In a similar way, I increased accuracy for -ab -ad -as -aa -ds -dt -ss -dp None of these seemed to work. I also triangulated the mesh down to min edges of 0.005m. No improvements as well.
@Dlagol ,
In that case, just use finer meshing parameters for planarizing your mirror such that the faces of the mirror are smaller than your grid size. At that point, you should get the lines in between the reflections off the individual faces to go away.