going back to some legacy scripts and noticing that the Ladybug Surface View Factor Analysis results just aren’t making sense. Curious if something changed in Rhino 7 that might have made the legacy components stop working…or it could just be something I did!
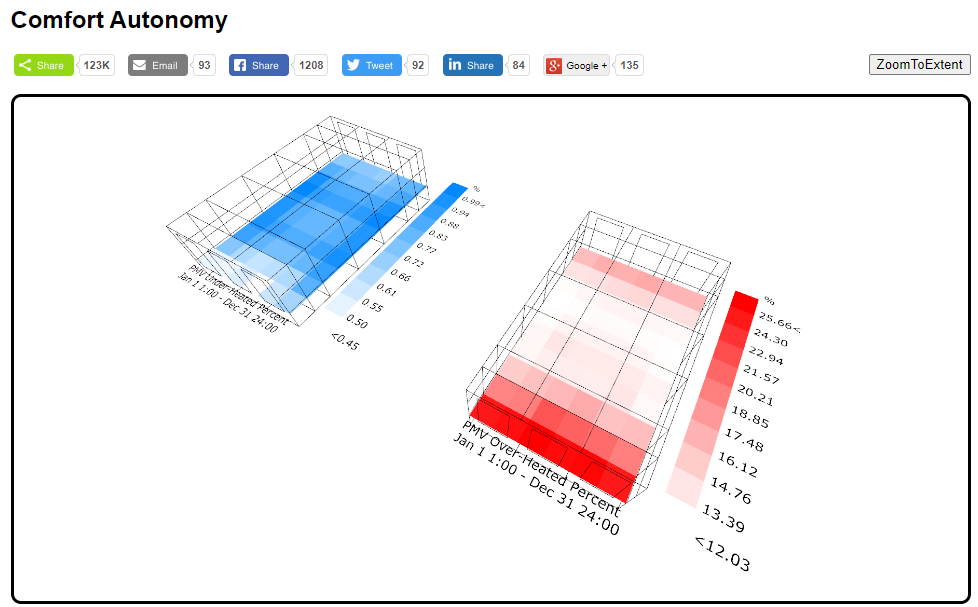
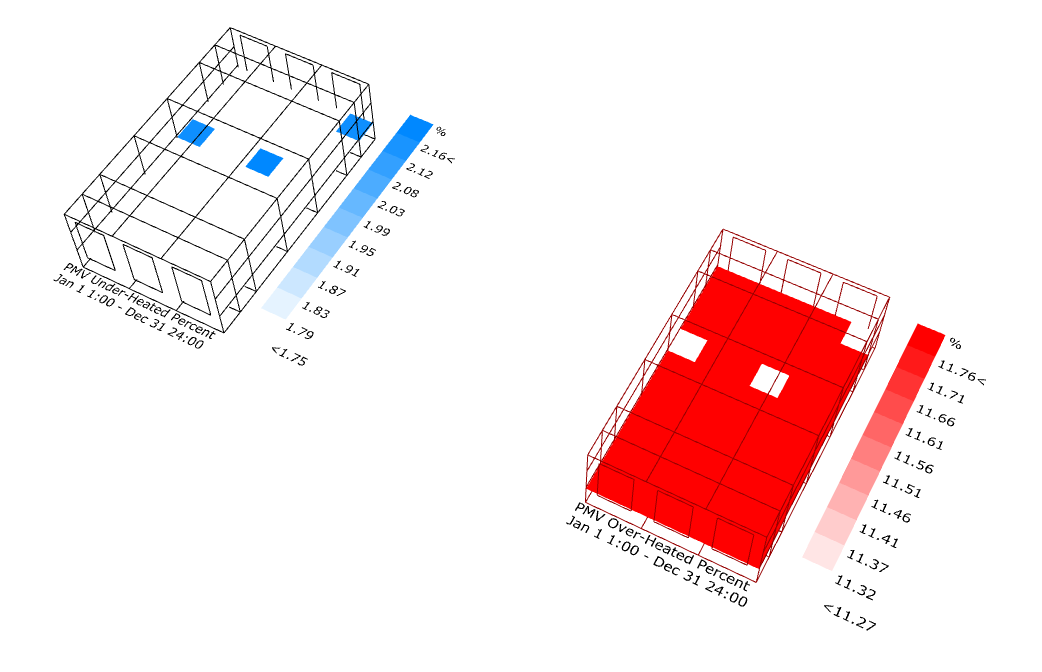
I’ve attached some generic test scripts, with the overlayed data labels on the test points representing the view factors for the exterior wall glazing…when i run the script, each test point has a view factor of 1.0, which does not make sense for this layout. Currently no context connected but i’ve experimented with many combinations and still getting off results.
I’m having similar issues with the legacy Surface View Factor component. I’ve looked into the native IsoVist Ray component for calculating the Surface View Factor but that isn’t perfect either I’ve found.
Currently, I’m looking into using Radiance to compute Surface View Factors, but any help with that would be greatly appreciated.
apparently, it’s a Rhino7 issue and if you still have Rhino 6 installed then the legacy Ladybug/Honeybee surface view factor components will work as intended…i unfortunately do not have Rhino 6 anymore.
I’ve managed to use the honeybee-radiance view-factor CLI command and wrote a little GHPython script around it.
Attached the Grasshopper file. See it as a proof of concept, but use it as you wish.
Really nice component, @marctavenier ! This is definitely one way to do it and it will scale nicely because it uses Radiance for the ray tracing.
I’ll try to add a LBT version of the Legacy Ladybug view factor component at some point, which will use Rhino’s ray tracing and be a little more immediate for small studies. But the legacy plugin generally doesn’t work in Rhino 7 since there were some changes in Rhino’s ray tracing and, given how much we copy/pasted code in Legacy, it’s really tough to go back and fix it now. At least I can say that we know better now and, when I finally get an implementation of LB View Factor in LBT, it should be able to work well long into the future.
Great algorithm!
May I ask why it gives 12 results, shouldn’t it be one result for each surface? (For each point on the sensor grid of course)
Is it possible to create a weight with respect to the surface it sees so it can also be used in EP in the People class?
Thank you very much
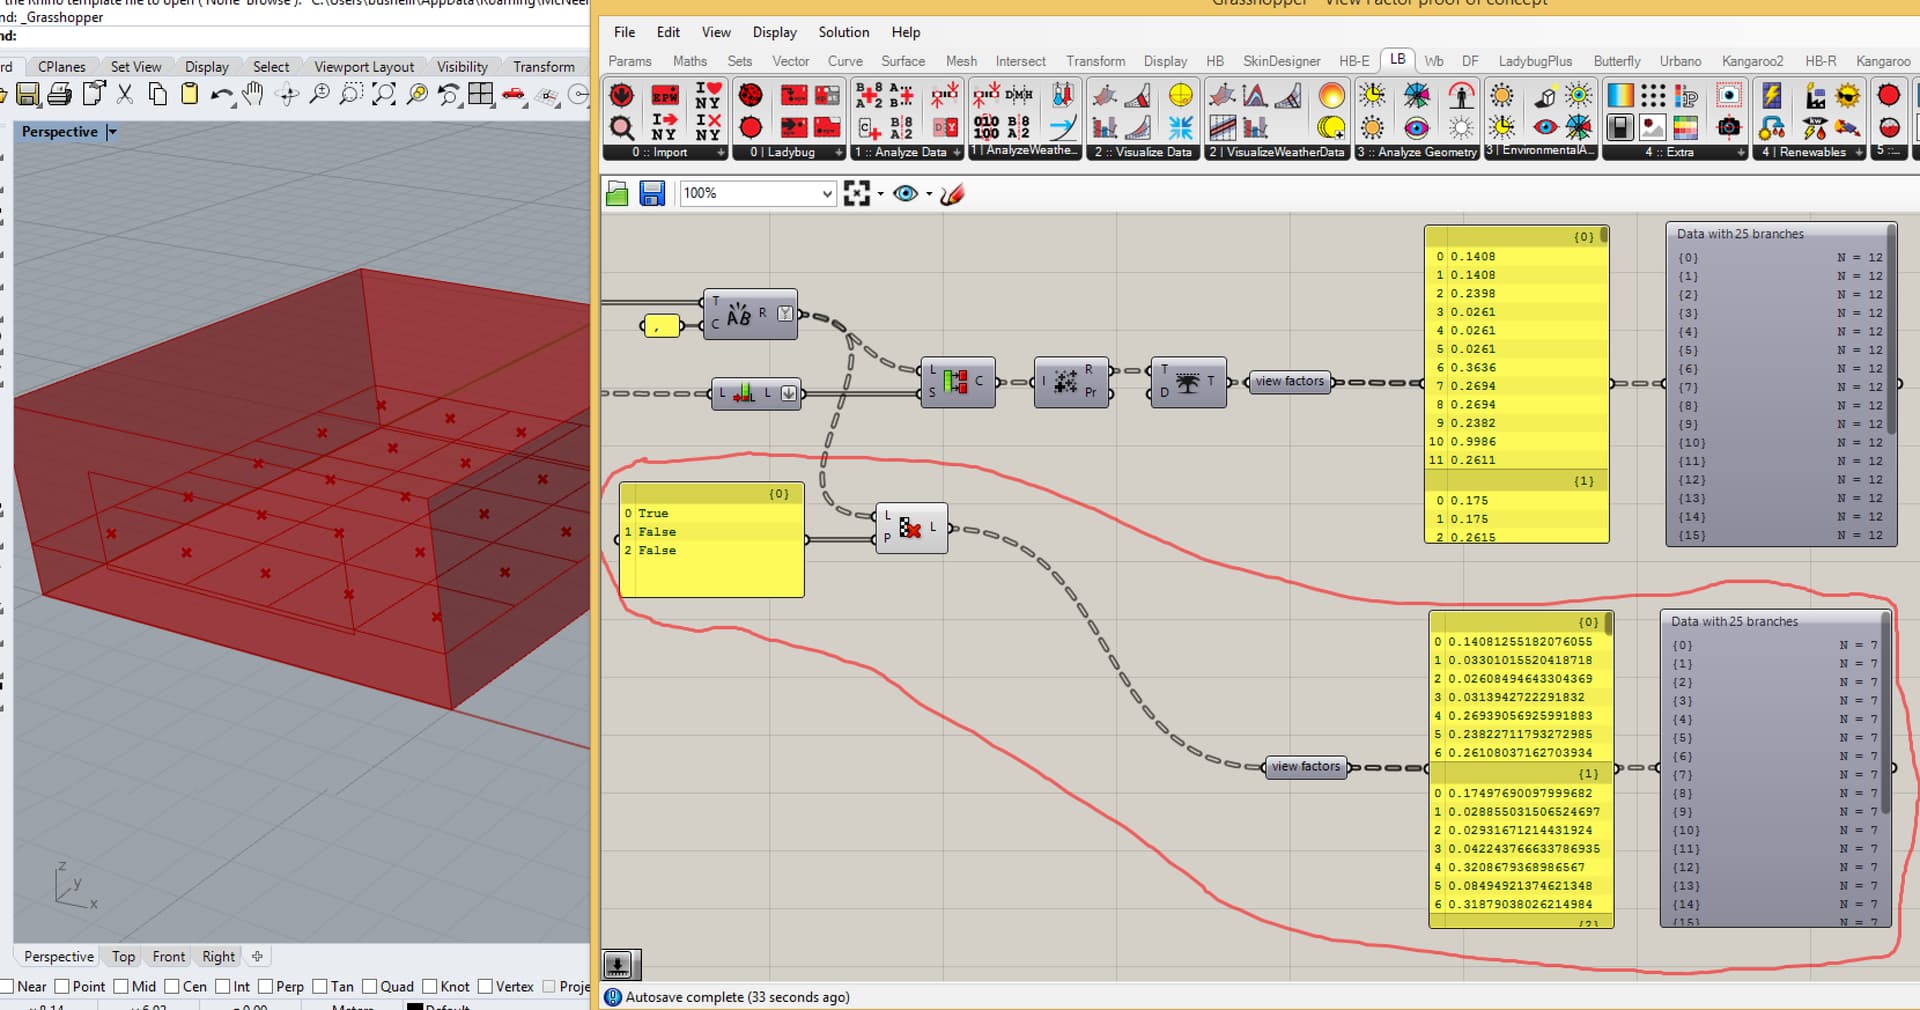
With the given inputs, the component gives out 4 view factor values per grid point (25 grid points) = 100 values. The 4 values correspond with the 4 geometry types input into the entwine component.
It is indeed possible to add a weight to the values. This is exactly what I do when using this component for a static mean radiant temperature calculation.
In red is my simple modification of your algorithm which I reported above as output (On Mac I tried, but I have to change the file path in the GHPhyton component).
It returns me 7 values (actually there are 7 surfaces in the model: 1 roof, 1 window, 4 walls and 1 floor) for each prunto of the grid (25 in all). The sum of the 7 values from 1, so they are already weighted! So I can select the point of interest with a list item and directly enter the values into E+.
Now I want to try to import an .idf, turn it into model and have the room recognized for the sensor grid.
The best would be to have the surface name and view factor matched directly.
Thanks again for the great support.
Massimiliano
Indeed you’re right in that Mac is not supported. The script is a proof of concept for Windows only.
What I don’t understand is why you’re getting the 12 values in the first place. For me it doesn’t do this.
Perhaps this comes down to the sub-par coding I did…
However, the 7 values you’re getting with the cull pattern component look to be correct though I’m not 100% sure.
To use IDF files with the current script, you’d have to convert it to a HBjson file first. For this you could use the HB Load gbXML OSM IDF component to convert it into a HBmodel, then add the grids to all rooms in the HBmodel and use the HB Dump Objects component to go from HBmodel to HBjson.
Hi @marctavenier !
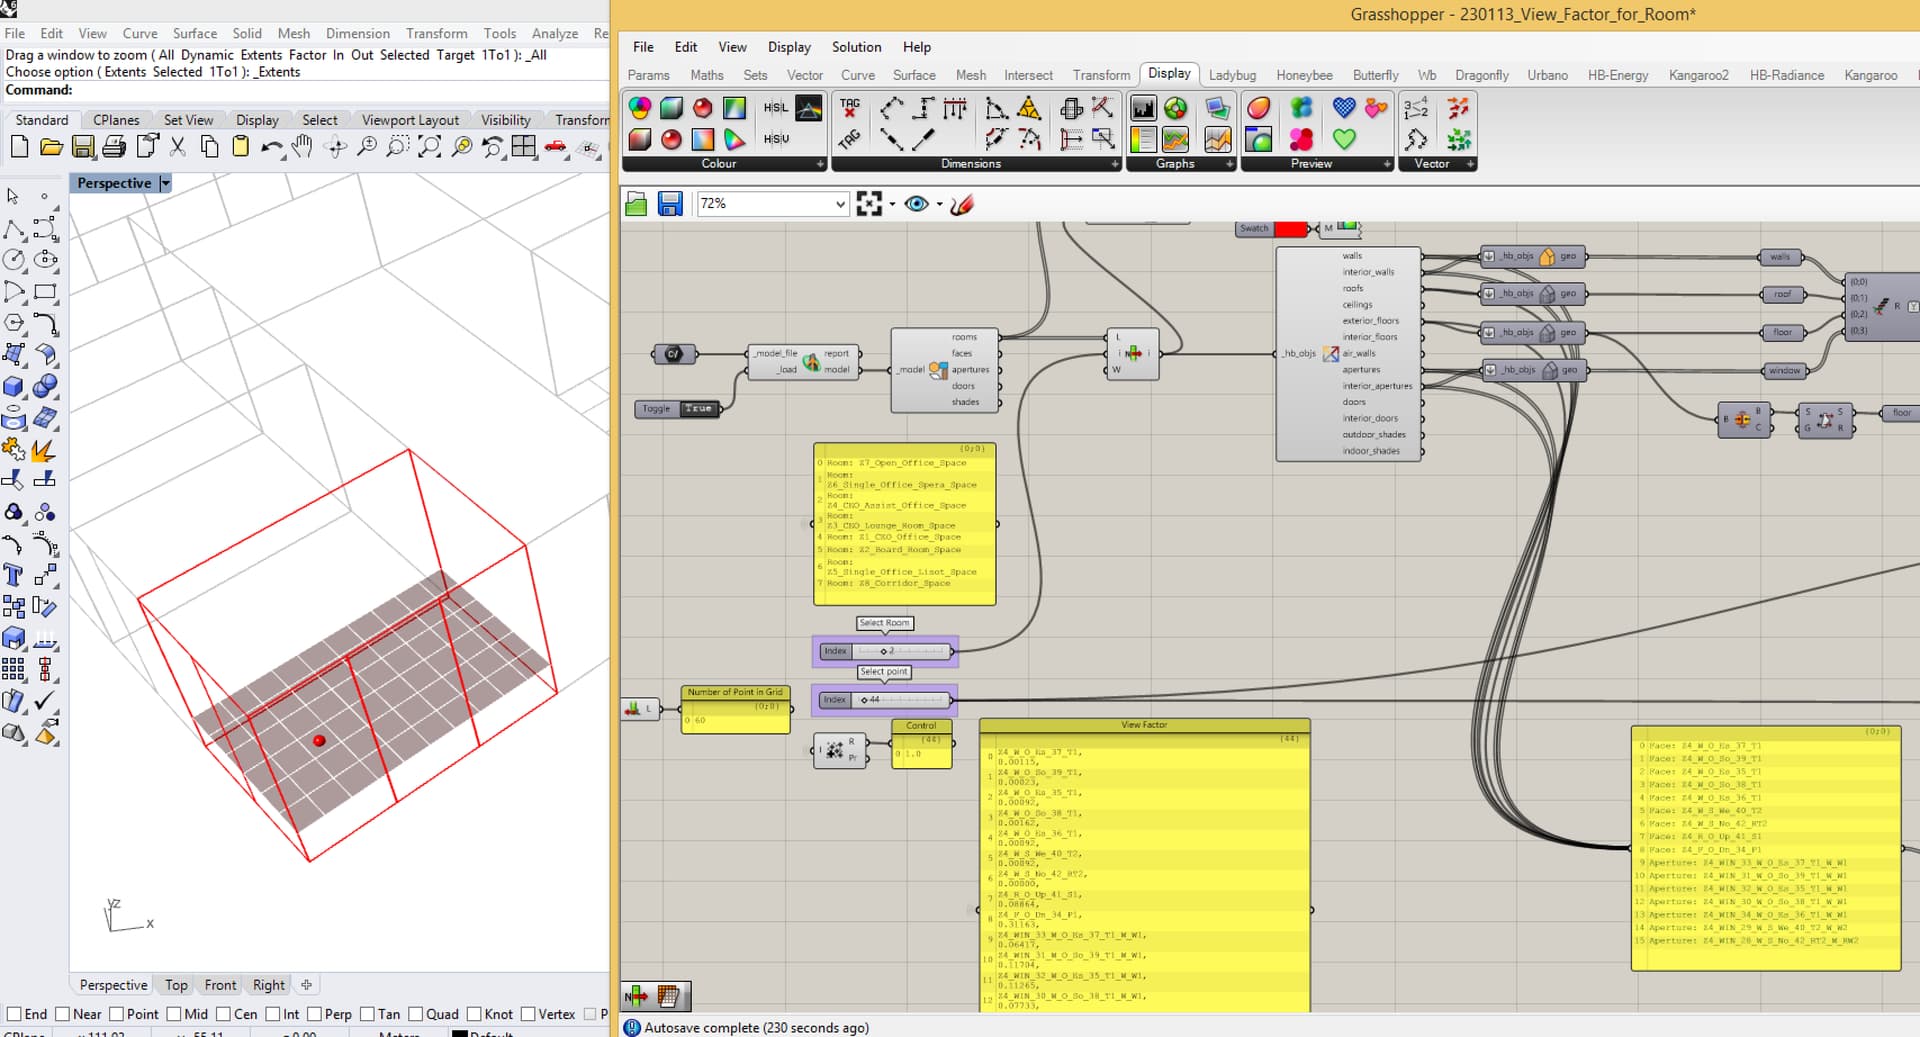
Your Python component works fine. With the modification I wrote you and provado on the imported .idf model I was able to create the algorithm that makes me choose the point in the grid and returns me the view factors coupled to the surfaces to copy/paste directly into the .idf
I’ll leave you a screenshot:
Hi @marctavenier,
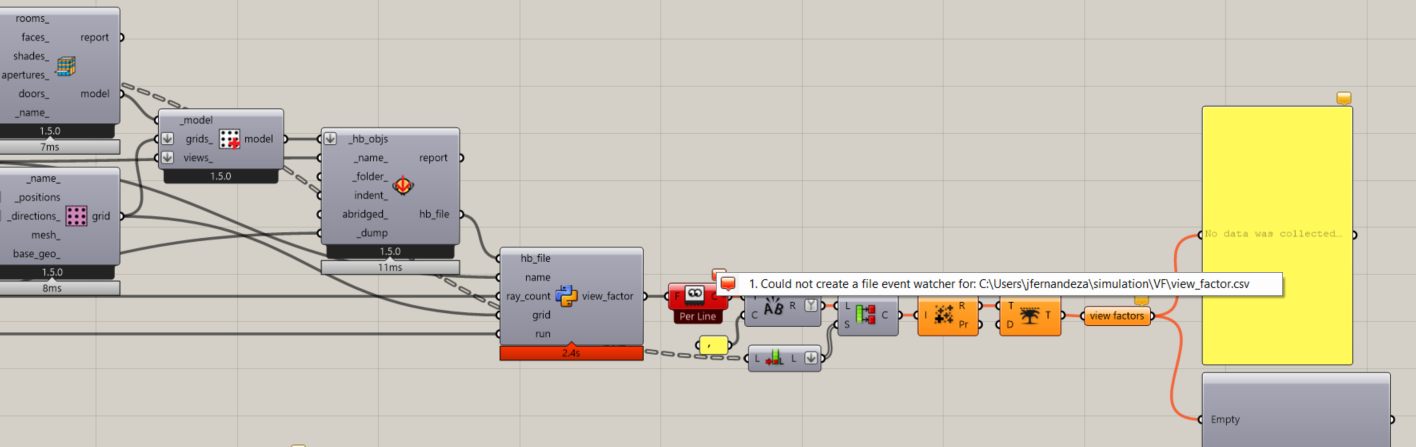
I have a similar issue, I have Rhino 7 and the srf view analysis is not working for me. I tried your script but is not creating any folder, I can only see the json file but no VF.csv file or any folder of that sort.
What am I doing wrong?
For me and my colleagues it does work so I’m not sure why for you it doesn’t. Are Ladybug/Honeybee and Radiance installed correctly? Easiest way to make sure is by downloading the Grasshopper Pollination plugin as it installs Radiance correctly as well.