Hi all,
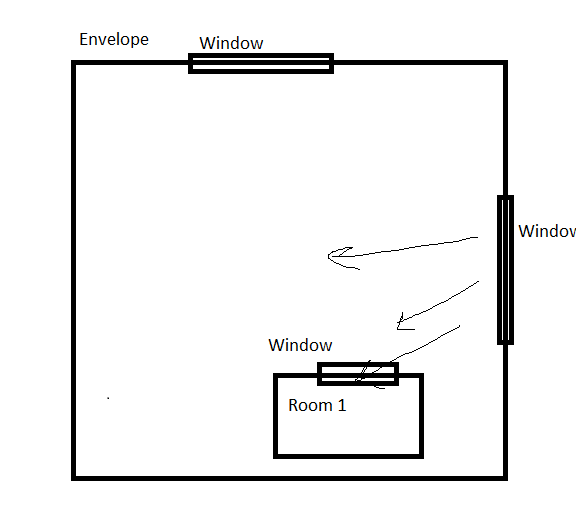
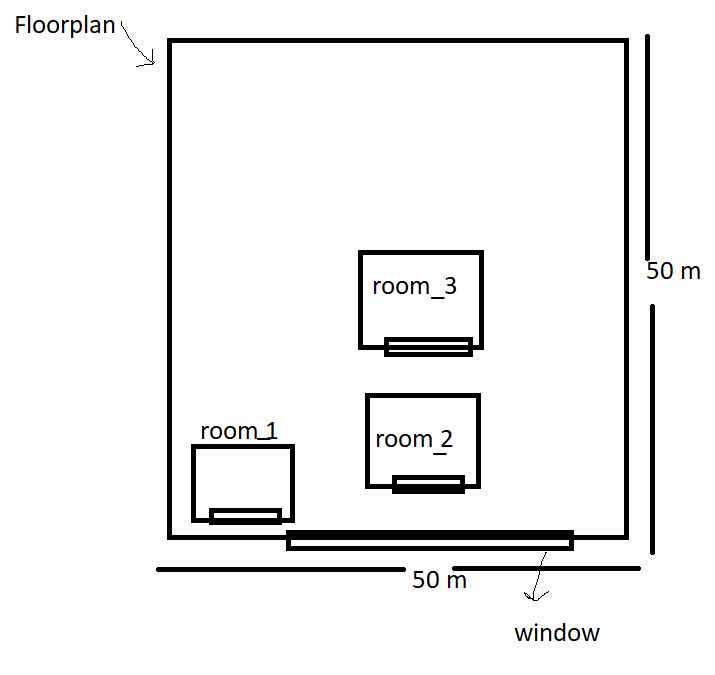
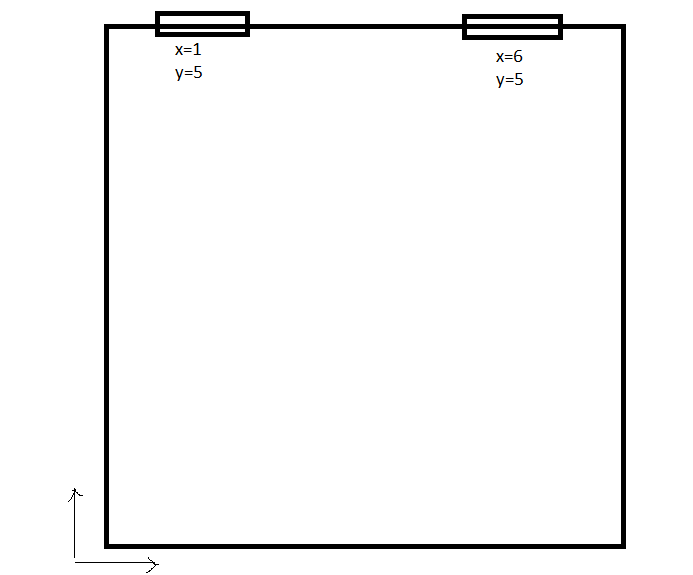
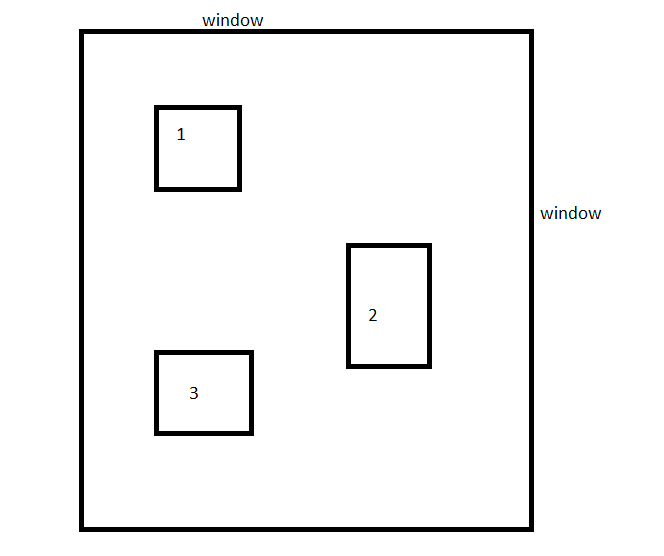
I have a question. I found this code for the ladybug tool which shows how to do light simulation given one room created on python. My problem is that I have a layout and 3 rooms as shown in the picture, so I want to modify this code so that I put the windows on the layout and I conduct the light simulation for the three rooms (1,2,3). However, the given code will not work because the windows are not located only in the rooms so I want to consider that each room has walls and a window and that the light is passed through the windows to the rooms. what changes to the codes are needed to tailor it to my problem? Note that this layout I have is also generated using python.
Can any one help me modify this code to account for this situation?
Thanks so much!
from honeybee.room import Room
from honeybee.radiance.material.glass import Glass
from honeybee.radiance.sky.certainIlluminance import CertainIlluminanceLevel
from honeybee.radiance.recipe.pointintime.gridbased import GridBased
# create a test room
room = Room(origin=(0, 0, 3.2), width=4.2, depth=6, height=3.2,
rotation_angle=45)
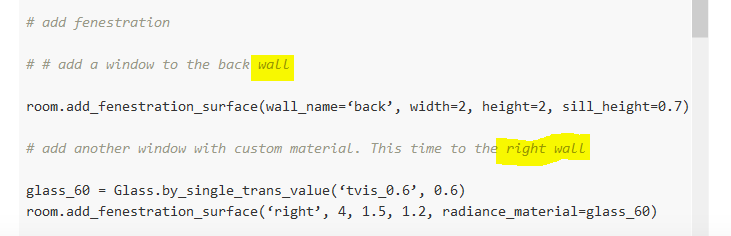
# add fenestration
# # add a window to the back wall
room.add_fenestration_surface(wall_name=‘back’, width=2, height=2, sill_height=0.7)
# add another window with custom material. This time to the right wall
glass_60 = Glass.by_single_trans_value(‘tvis_0.6’, 0.6)
room.add_fenestration_surface(‘right’, 4, 1.5, 1.2, radiance_material=glass_60)
# run a grid-based analysis for this room
# generate the sky
sky = CertainIlluminanceLevel(illuminance_value=2000)
# generate grid of test points
analysis_grid = room.generate_test_points(grid_size=0.5, height=0.75)
# put the recipe together
rp = GridBased(sky=sky, analysis_grids=(analysis_grid,), simulation_type=0,
hb_objects=(room,))
# write and run the analysis
batch_file = rp.write(target_folder=r’c:\ladybug’, project_name=‘room’)
rp.run(batch_file, debug=False)
# results - in this case it will be an analysis grid
result = rp.results()[0]
# print the values for each point
for value in result.combined_value_by_id():
print(‘illuminance value: %d lux’ % value[0])