Welcome everyone! It took me some time but after weeks of hard work I can show you my bachelor degree I’ve done in ArchiCAD with Grasshopper and - of course - Ladybug tools. At this point I’d like to thank everyone on this forum! Everyone that helped me directly or indirectly and definietly I’d like to thank @mostapha and @chris and everyone working hard on improving Ladybug tools!
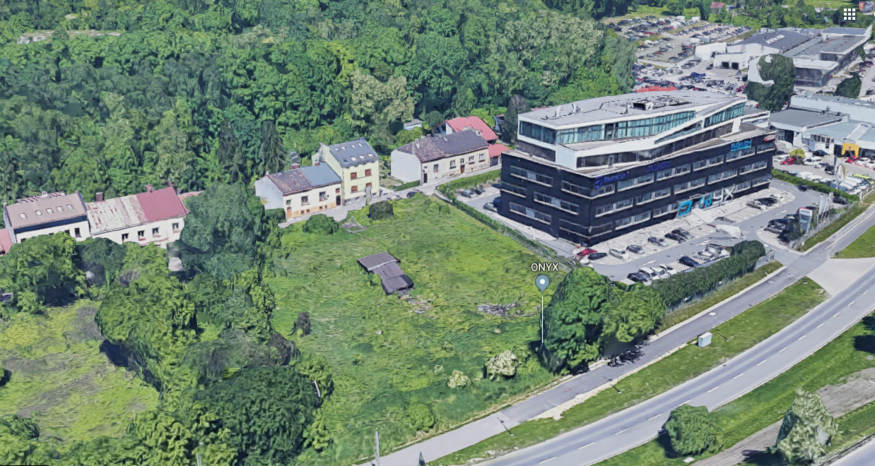
I wanted to do something new, something eco and most of all - parametric. I wanted to test my knowlage and capabilities. First of all I needed a place for my building. I’m studying and working i Krakow, Poland so thats what I chose. This is the plot of land that I found best suited for what I wanted.

And as always in our work - I started sketching.

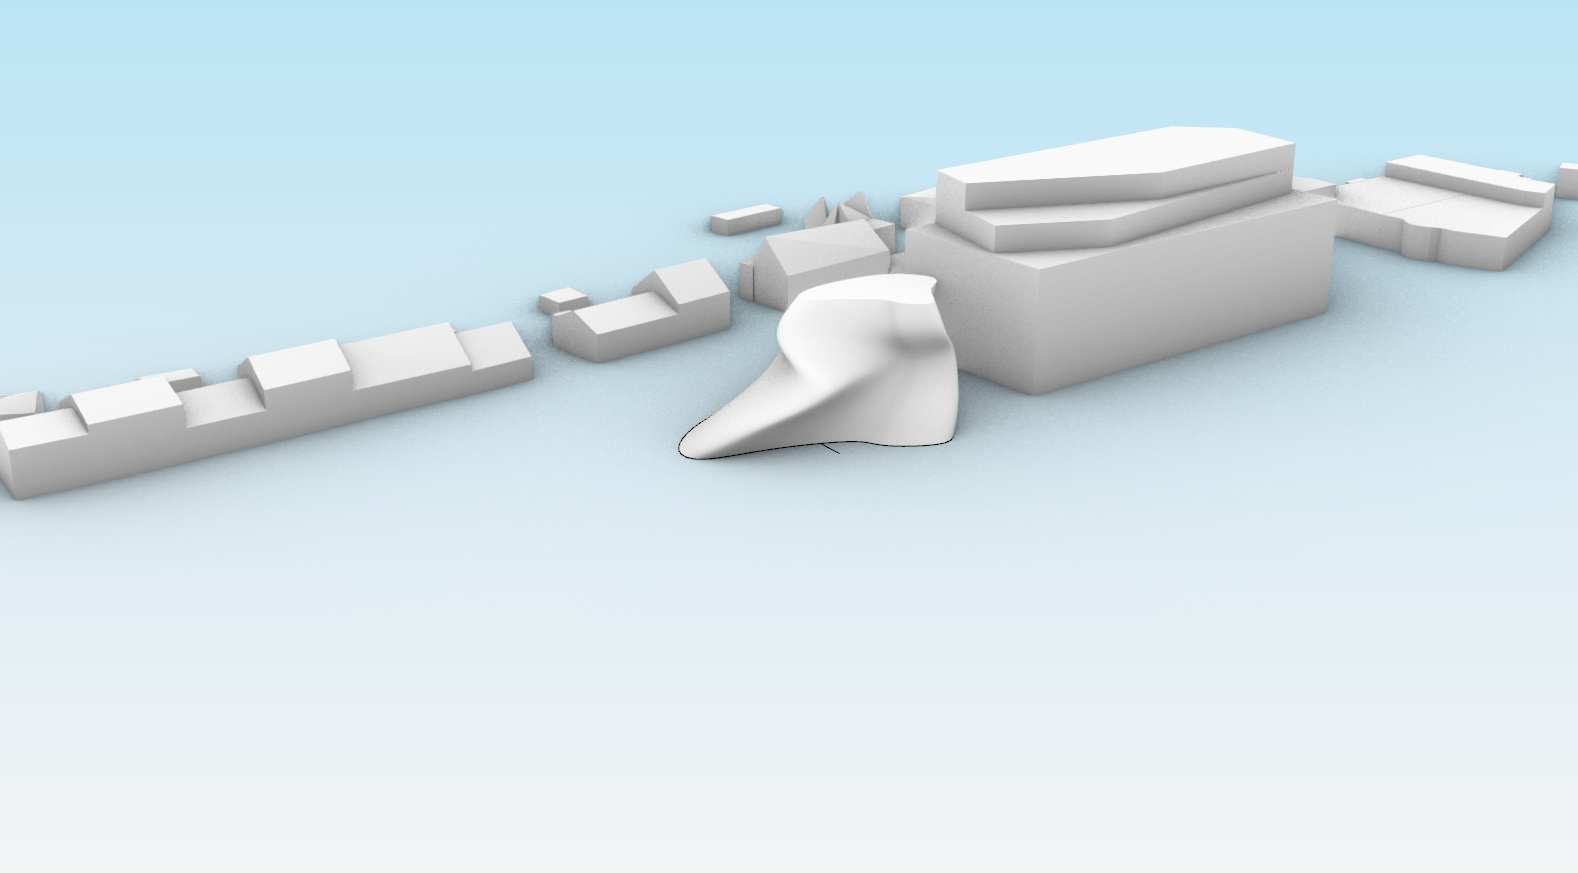
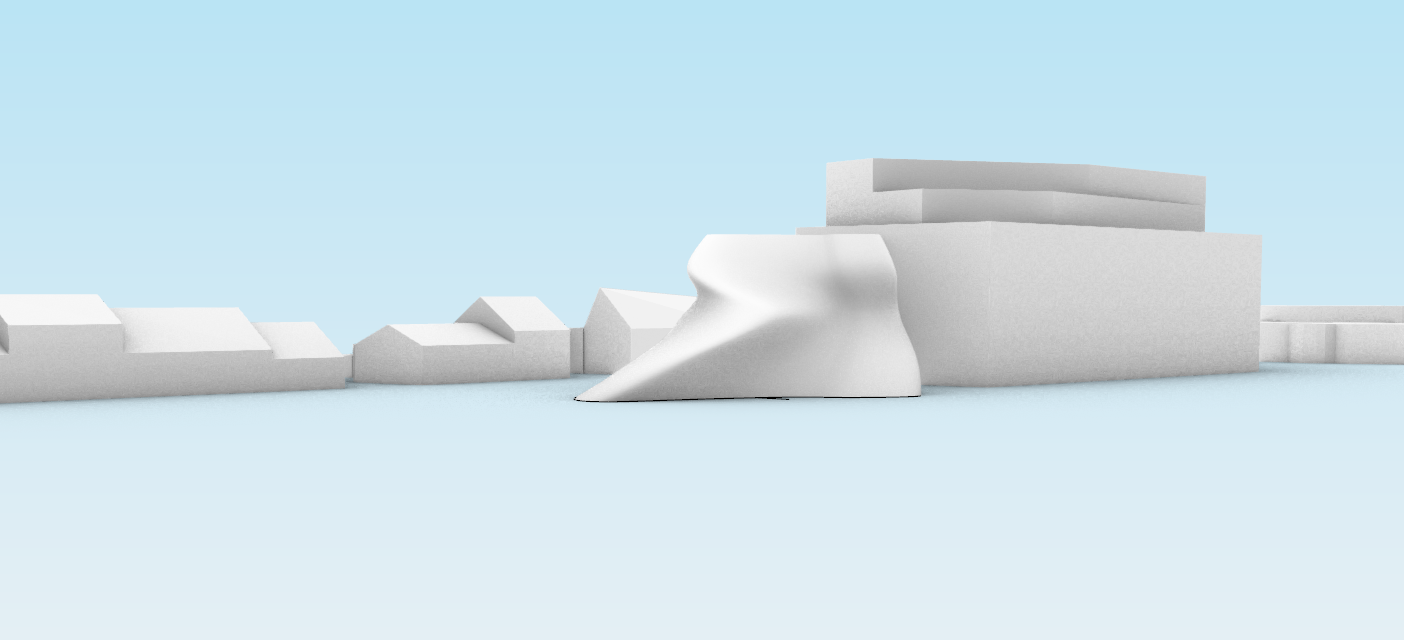
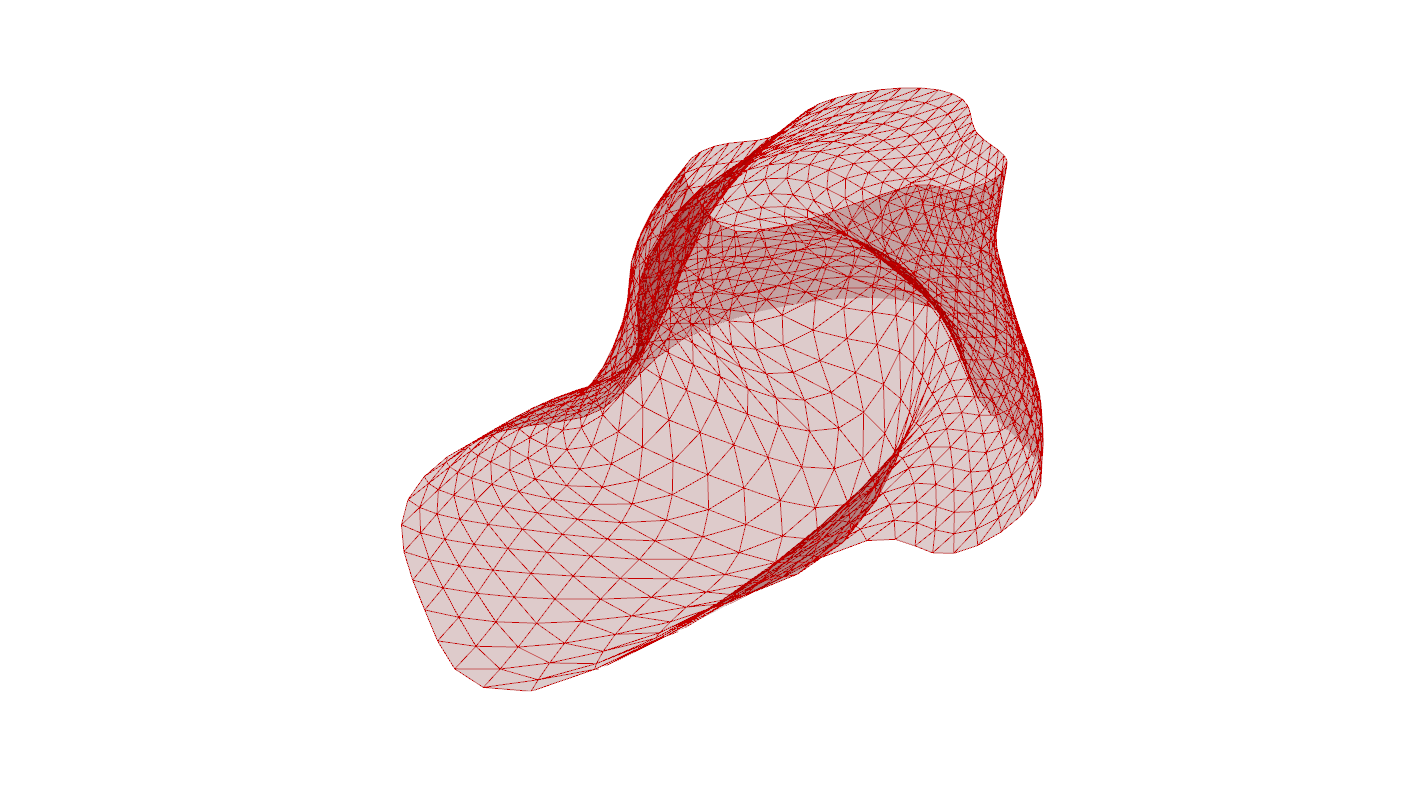
Now, when I found the shape that satisfied me in aesthetical way and had eco-potential, best suited for the place and specific plot of land I started modeling the building - in Grasshopper and Rhino - and “merged” it in Rhino with surroundings made in Archicad just to check the scale.
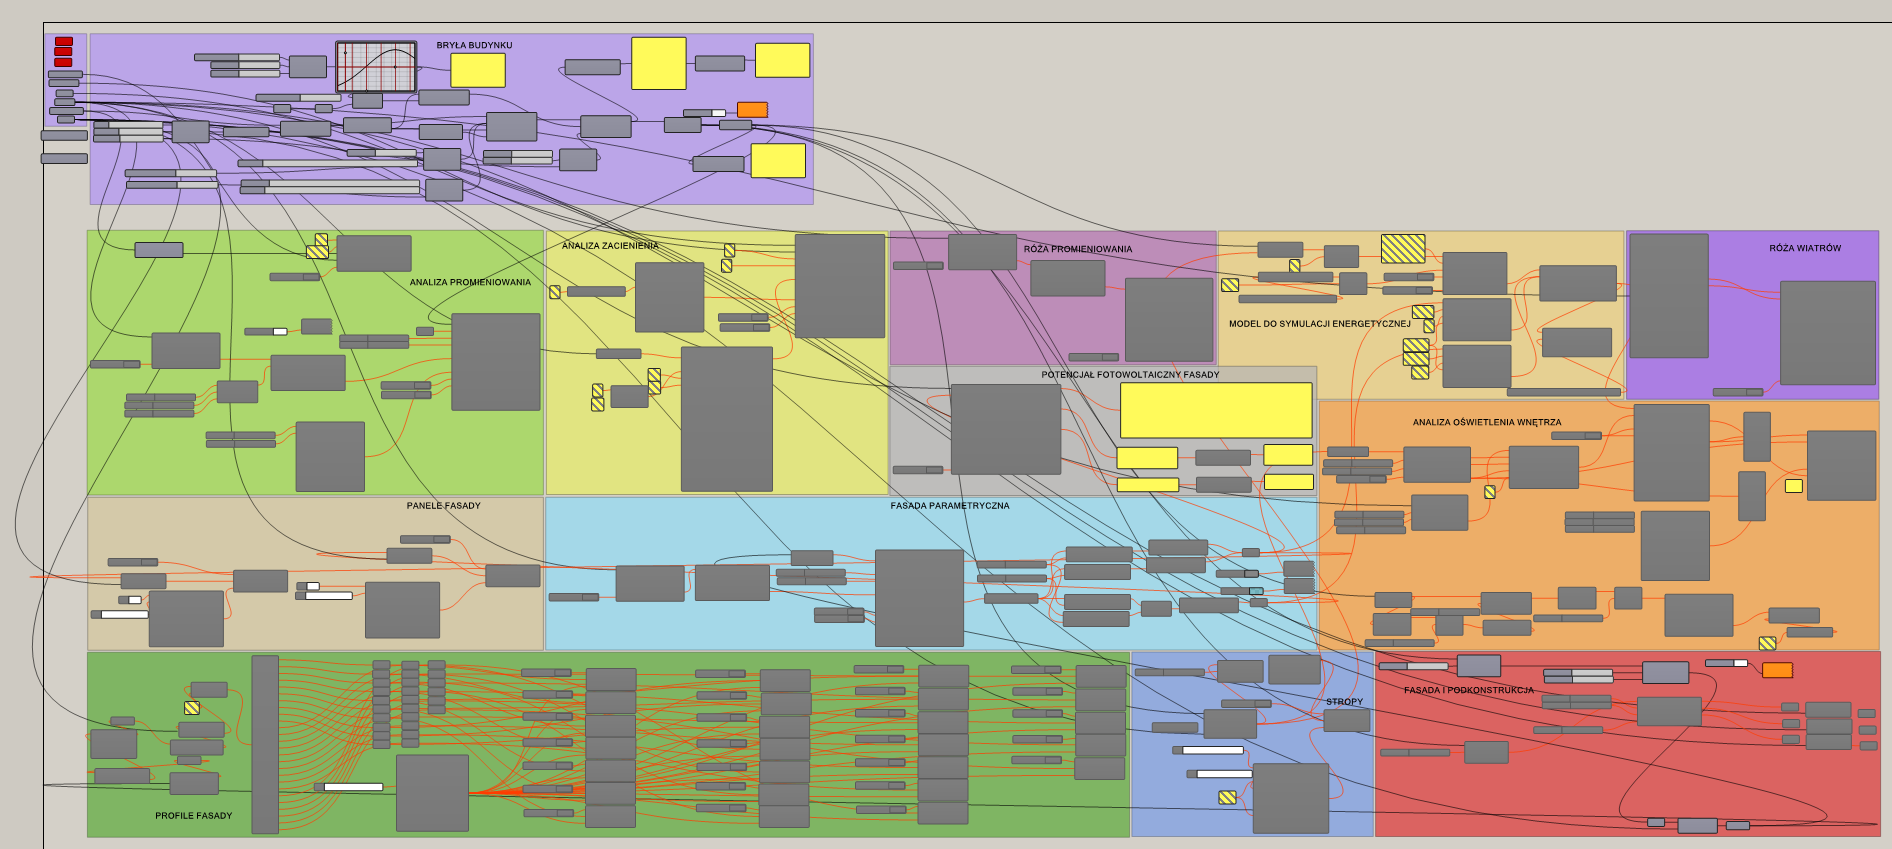
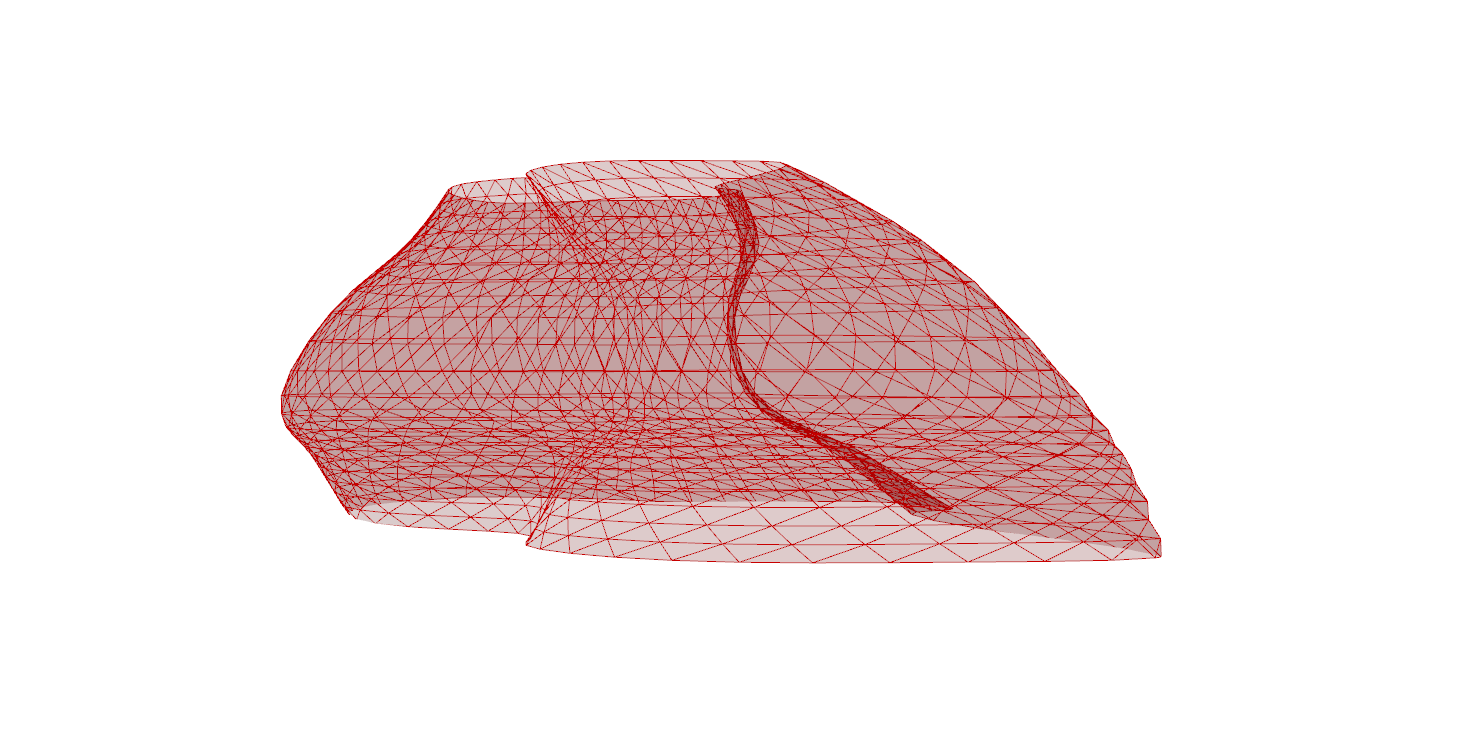
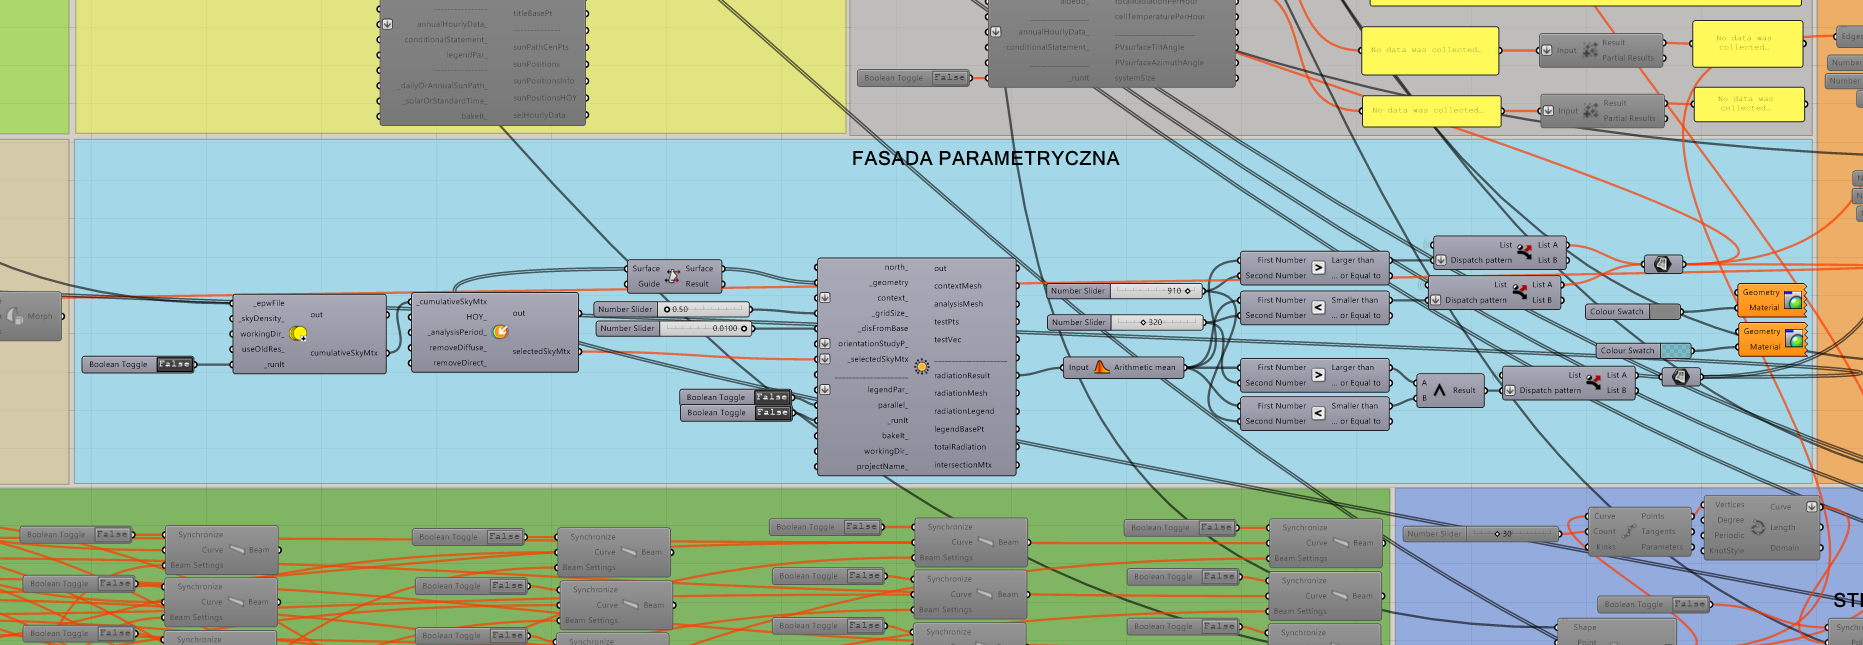
Now, having the overall shape, it was the time to begin the fun part. It all started slowly with Lunchbox and dividing the shape in triangles with sizes more or less possible to recreate in real world.
And then was the sweetest part. Enviromental analysis that really had an impact on the design and had me rethink some of the parts. Of course I did a research before even I started sketching - thing like directions of the world, terrain sculpture and so on. But the analisys from the Ladybug were a real deal. Also they played huge part in my bachelore degree. You could almost say that they were the main part 
So! The very first analysis (actually I did it before I started sketching - thus the shape - but I re-did it for the sake of graphical visualization) was the simple wind analysis.
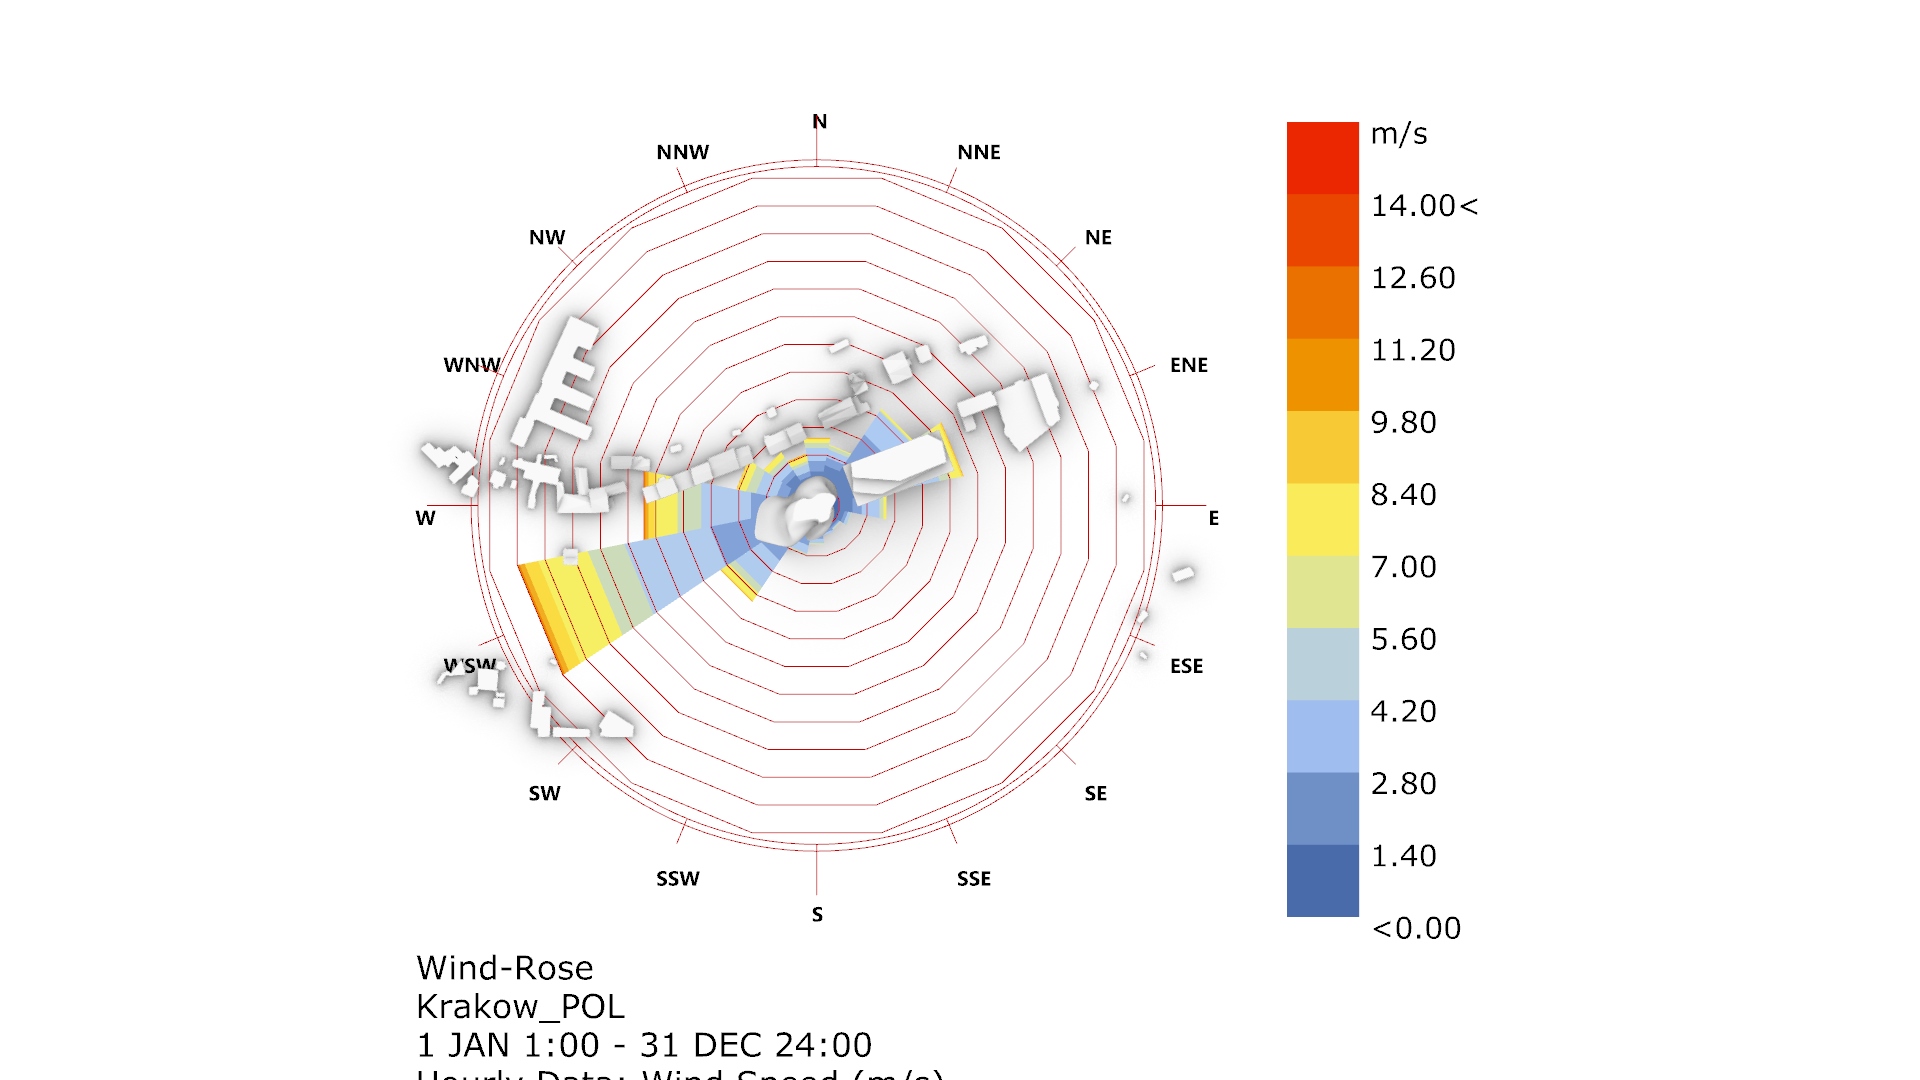
It played enormous part in my desing. Cracow is suffering from bad city ventiation. Big city arteries and open spaces, planned decades ago as the ones responsible for air movement in the city are being blocked, hence no air movement in the city center. Therfore I wanted to create my building as much aero-dynamic as possible so my building wouldn’t contribute to the problem. As the design started growing I thought that not only I can minimize my impact on the surrounding but I can also minimize the impact of a near block. So, this spire-like design is a product of a wind analysis done for my terrain.
Next analysis that I’ve done was shade analysis. I’ve done plenty of such images for different parts of year, specific days etc. The image above show situation on winter solstace. I wanted to make sure that my builing won’t “produce” abnormal shade that would hard for surrounding houses.
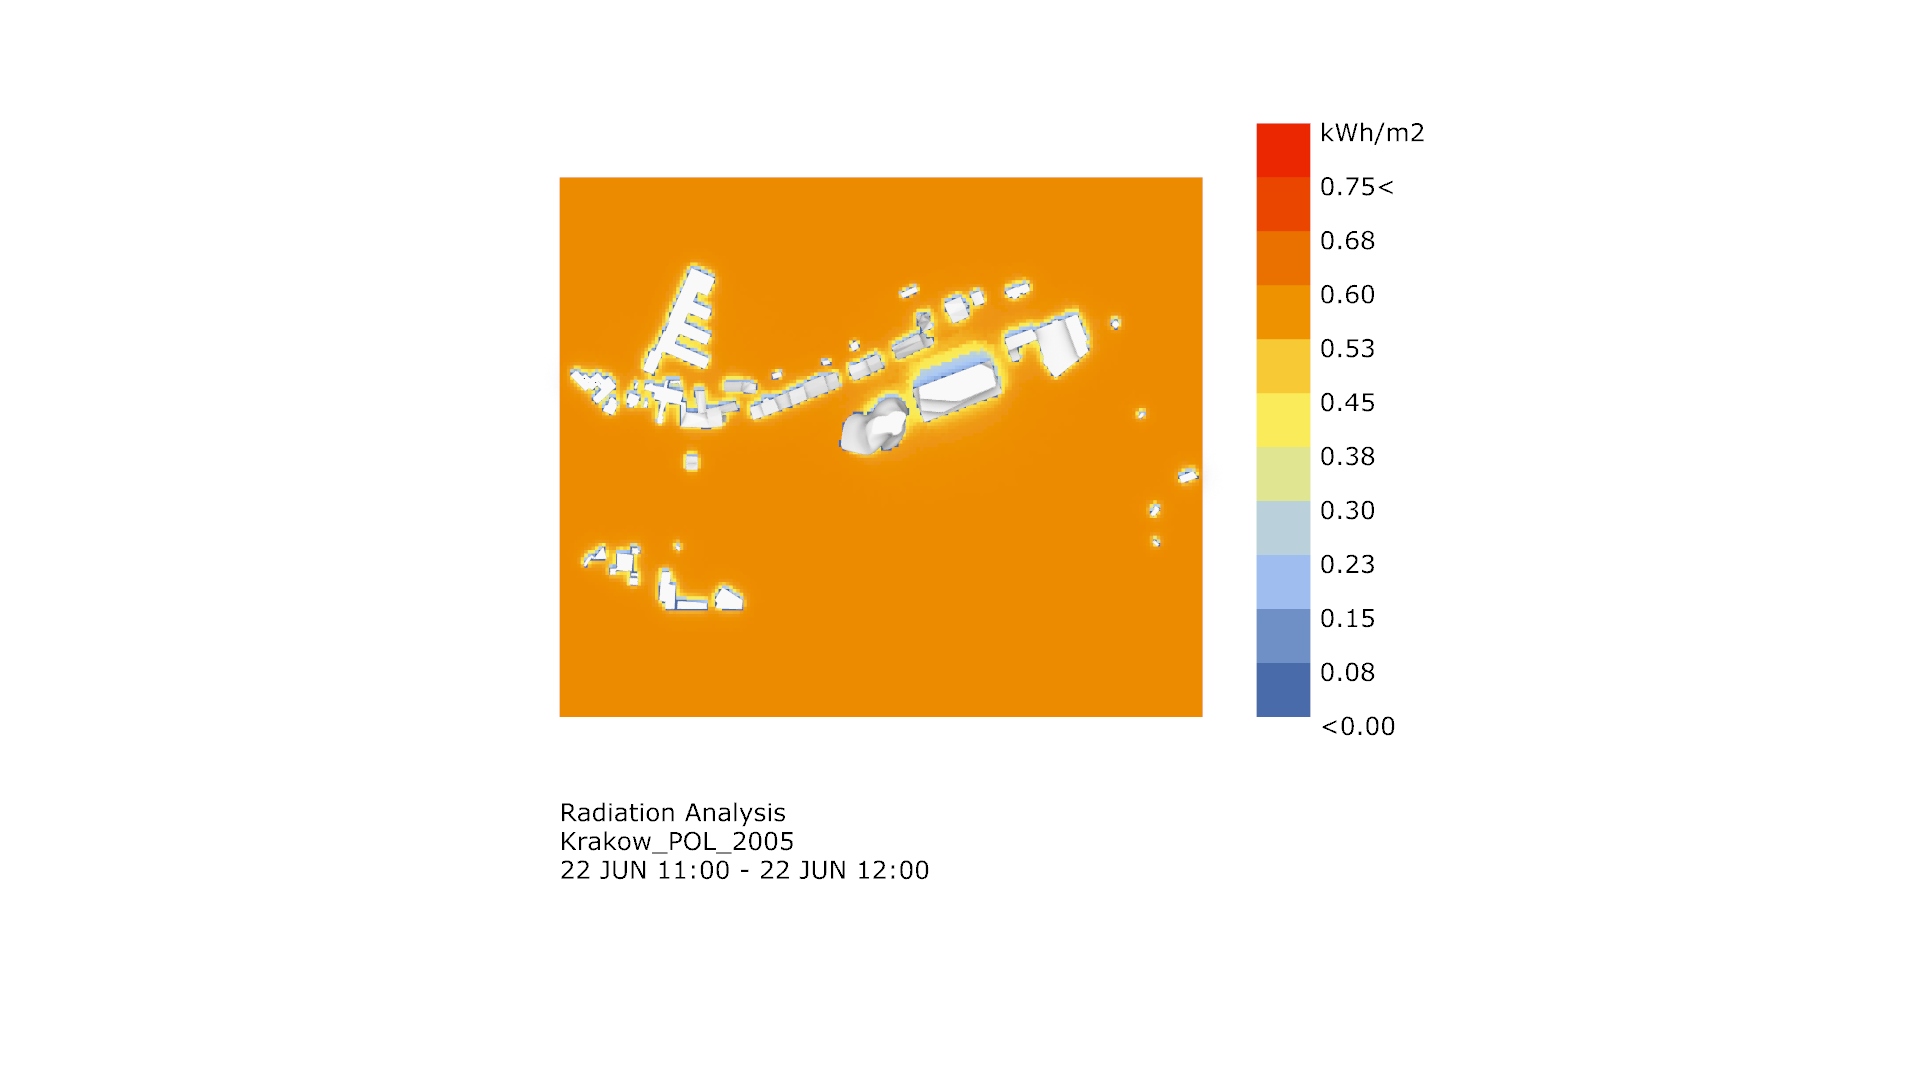
And right after I made sure that situiation with shade is completle normal and proved it I moved forward and I checked what I can benefit from my localization. First analise tested the amount of solar radiation in the surrounding. Seeing those numbers, the amount of sunny days, the maximums and minimums of solar radiation made me think on how to use it. Or should I even consider using it (sometimes using solar power would be not economical and using wind power for example would be better idea). After checking those numbers and some reading I decided that I’m gonna use solar panels. Lots of solar panels.
How many of them? Thats the tricky part that I am most proud of. Also that part had biggest impact on the final image. I wanted to maximize solar gains, to utilize solar light but at the same time I wanted to minimize overheating or leaking too much heat during winter. All of that as passive as possible. I didn’t want to use any moving parts on my facade. I know that those look cool and do great work but also they cost a lot of money and need regular reparing and maintaince while passive solutions don’t. So the choice was clear to me. To give you wider image - during summer temperatures can reach up to 35C (95F) in the shade, 30C (86F) is easly reached. In winter temperatures fall down to -15C (5F) and are not a suprise and from time to time we note around -20C (-4F). So the building has to be very vesatile in energy use, heating and cooling terms. SO I made an analysis. Analysis that tested the amount of radiation on each and every panel on my building.
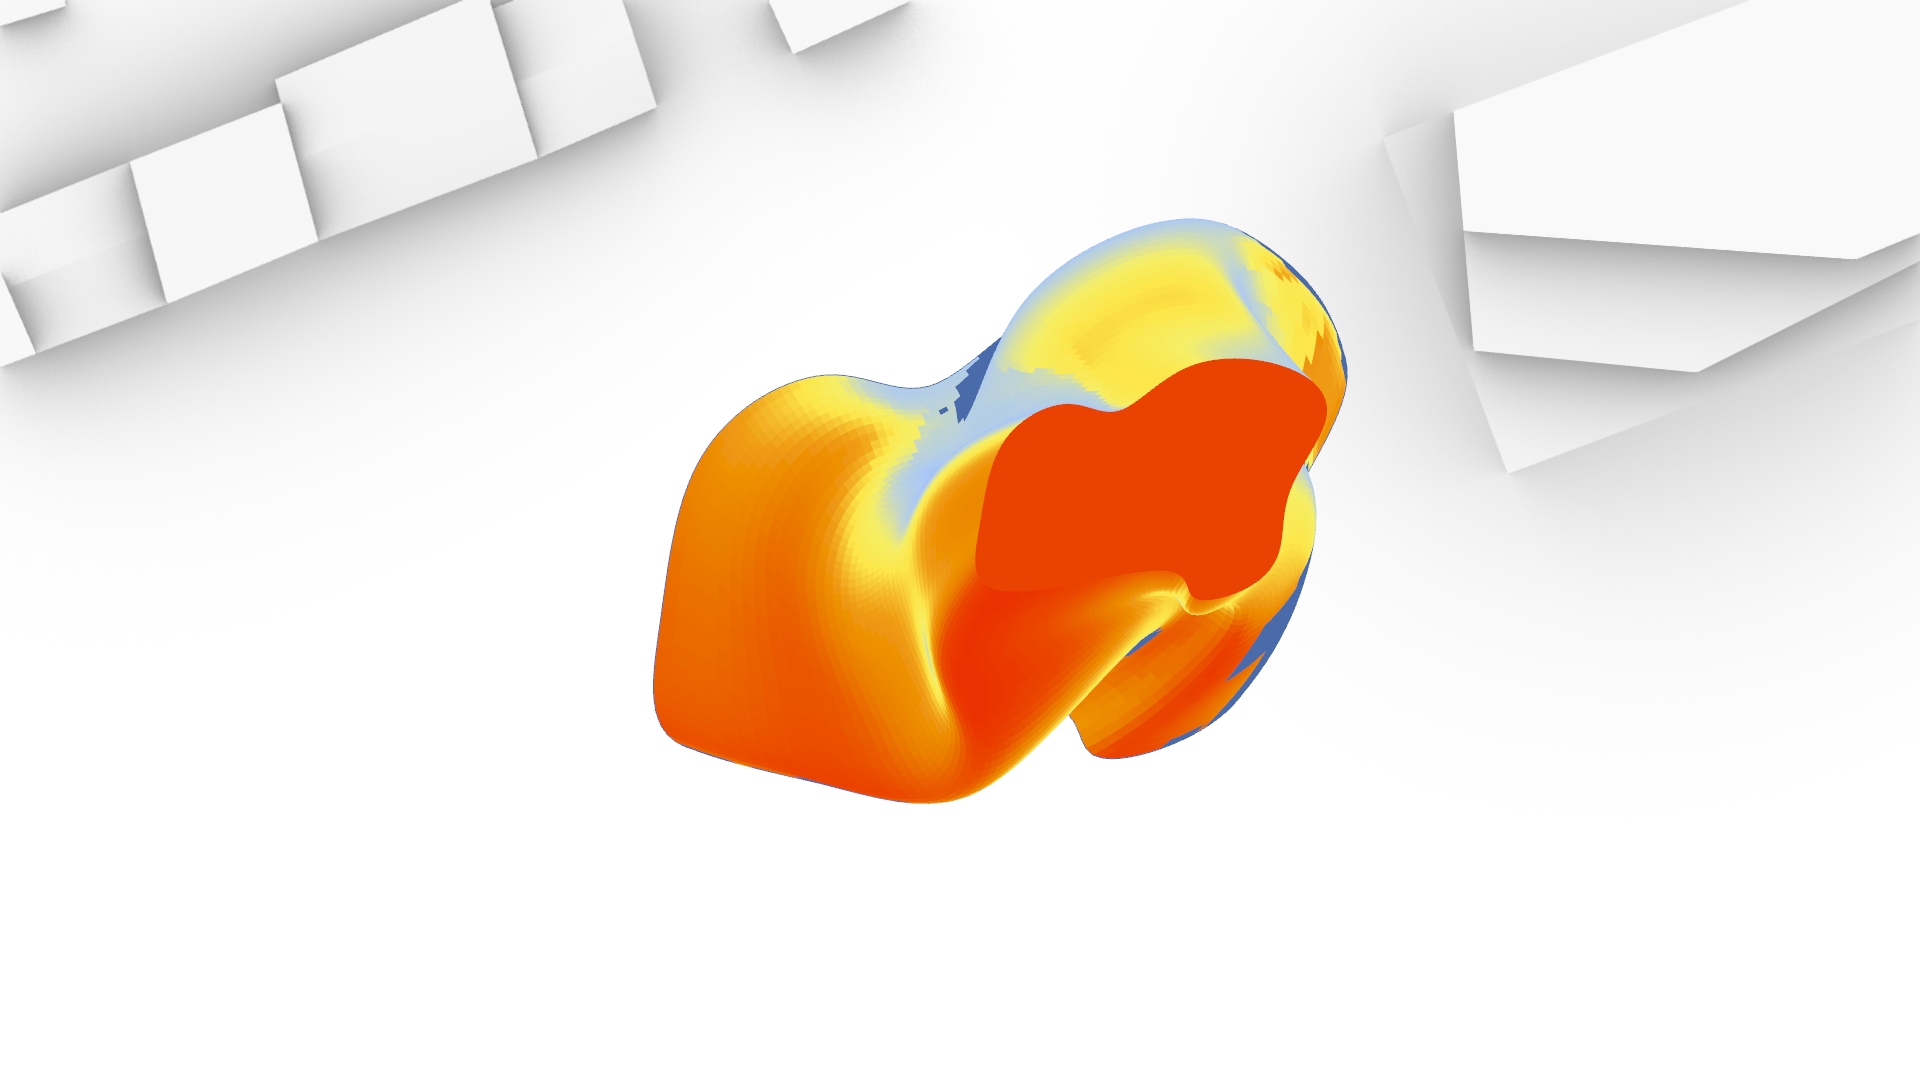
Here is the summer solstace
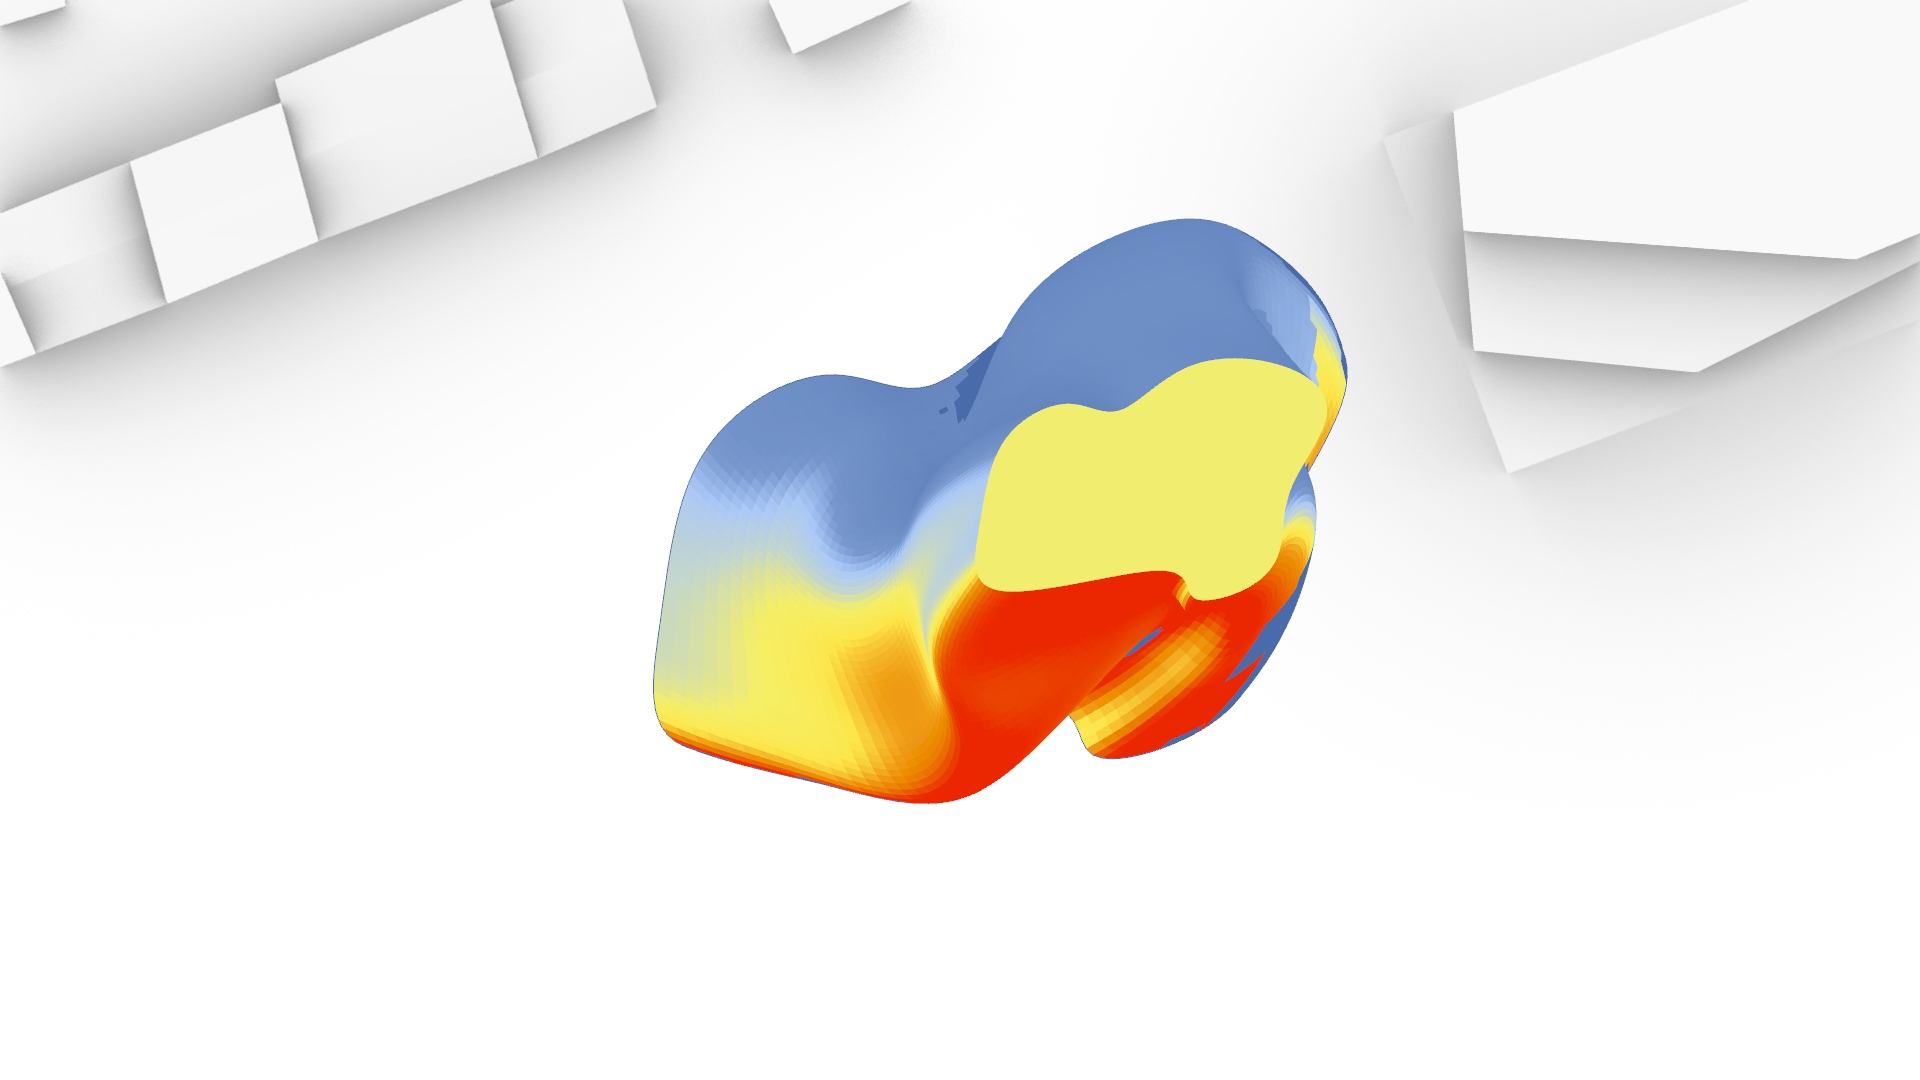
Winter solstace

and equinox.
And I wrote a formula that divided panel in two sections - one with panels gaining between 320 kWh/year and 910 kWh/year and second one that contained the panels that fell out of the mentioned range. Then I took the first group and made it out of glass while the second group were full panels. In that way I got rid of the “useless” panels. Those panels would only contribute to my buliding by overheating or overcooling it so I made them with thick isolation so they actually helped. The panels that fell inside that range were the “good” panels. They kept my builing warm, but not too hot and also prevented it from overcooling during winter.
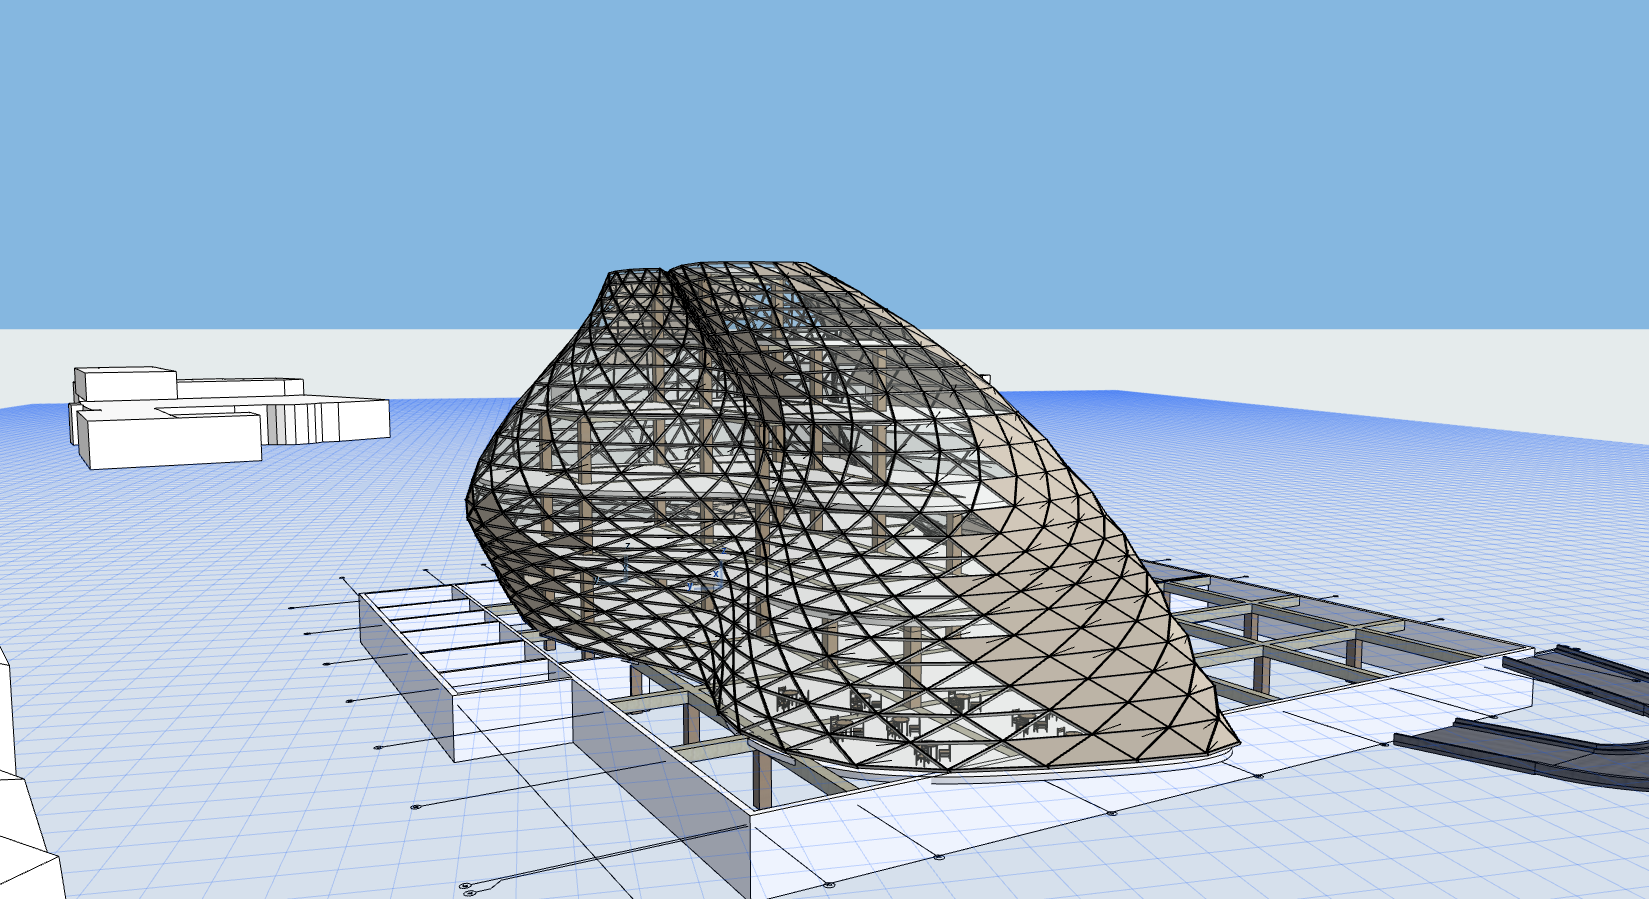
After doing all of these my ArchiCAD looked like this.

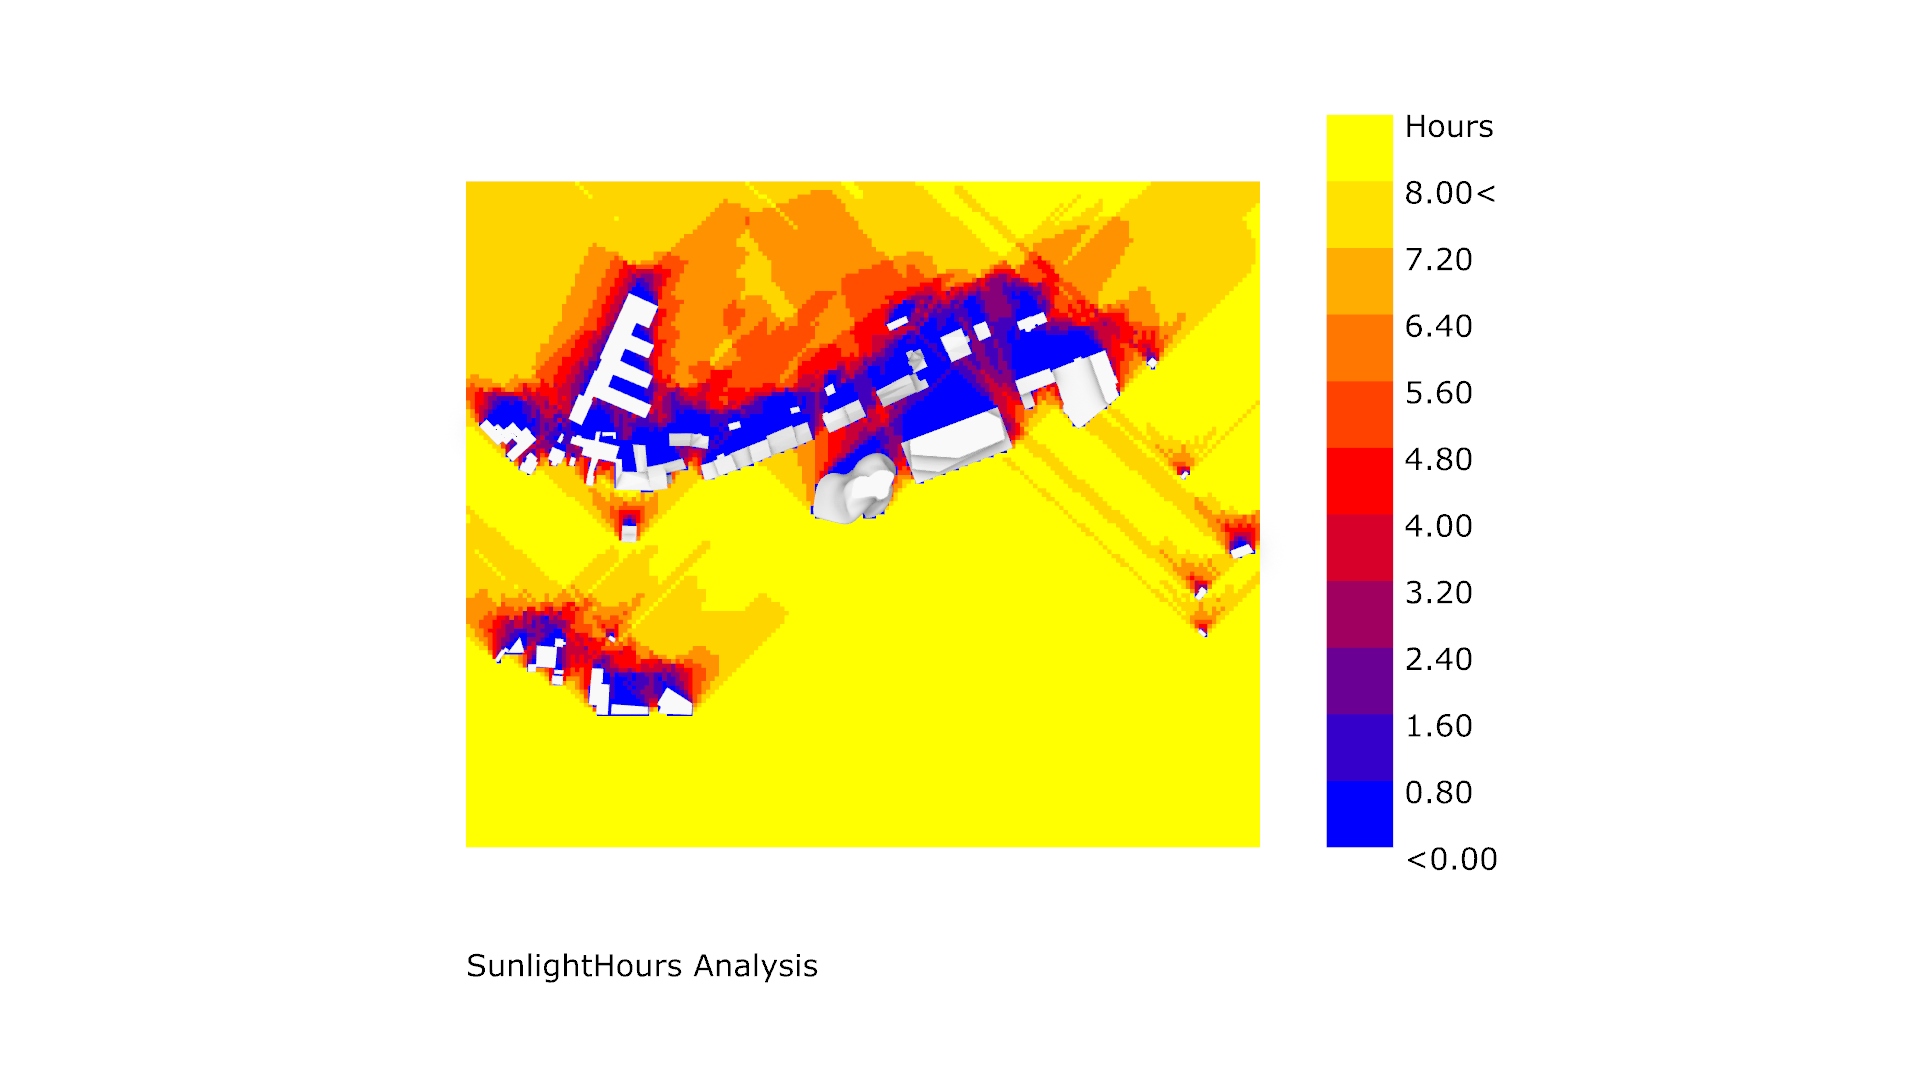
Then I knew one thing - there might be a problem with sunlight inside the bulding. Soo… I did not hesitate and I used Ladybug to test it!
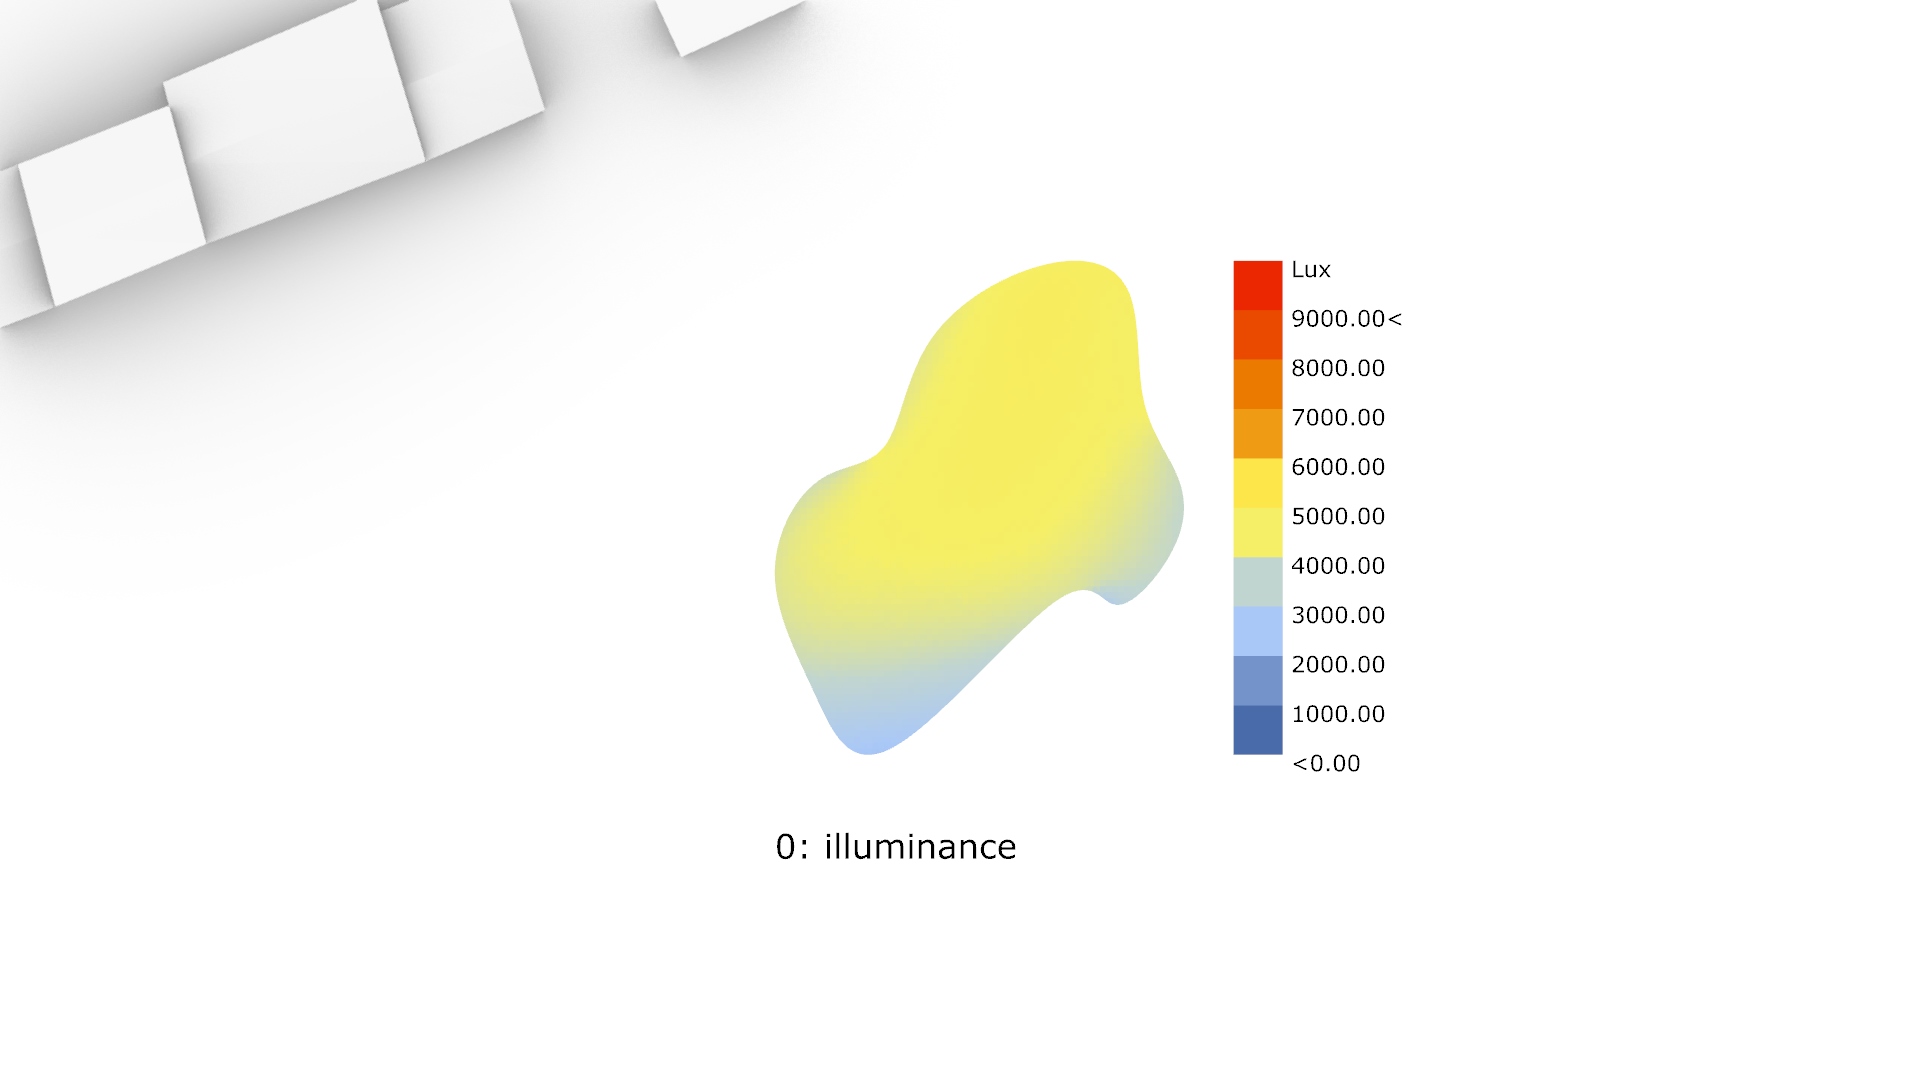
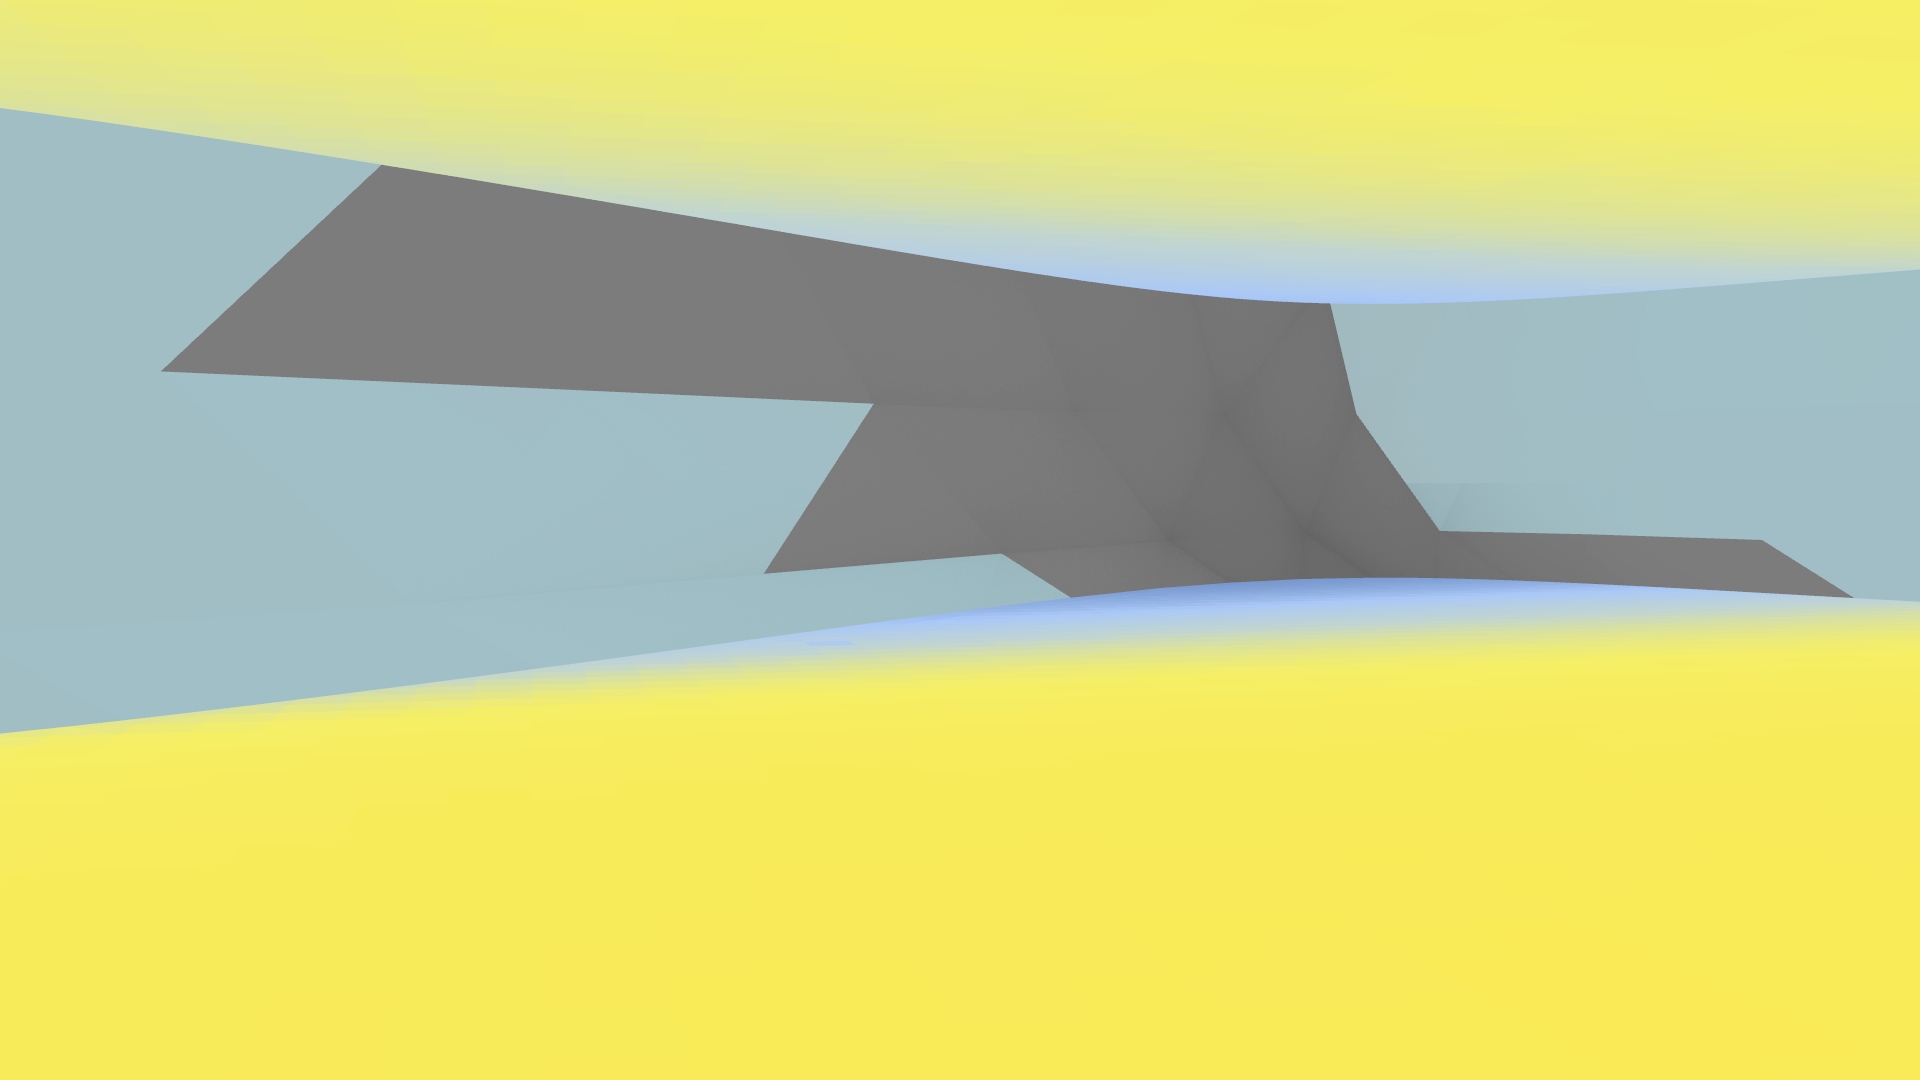
I did a test for every floor just to make sure everything is well lit. And it was 
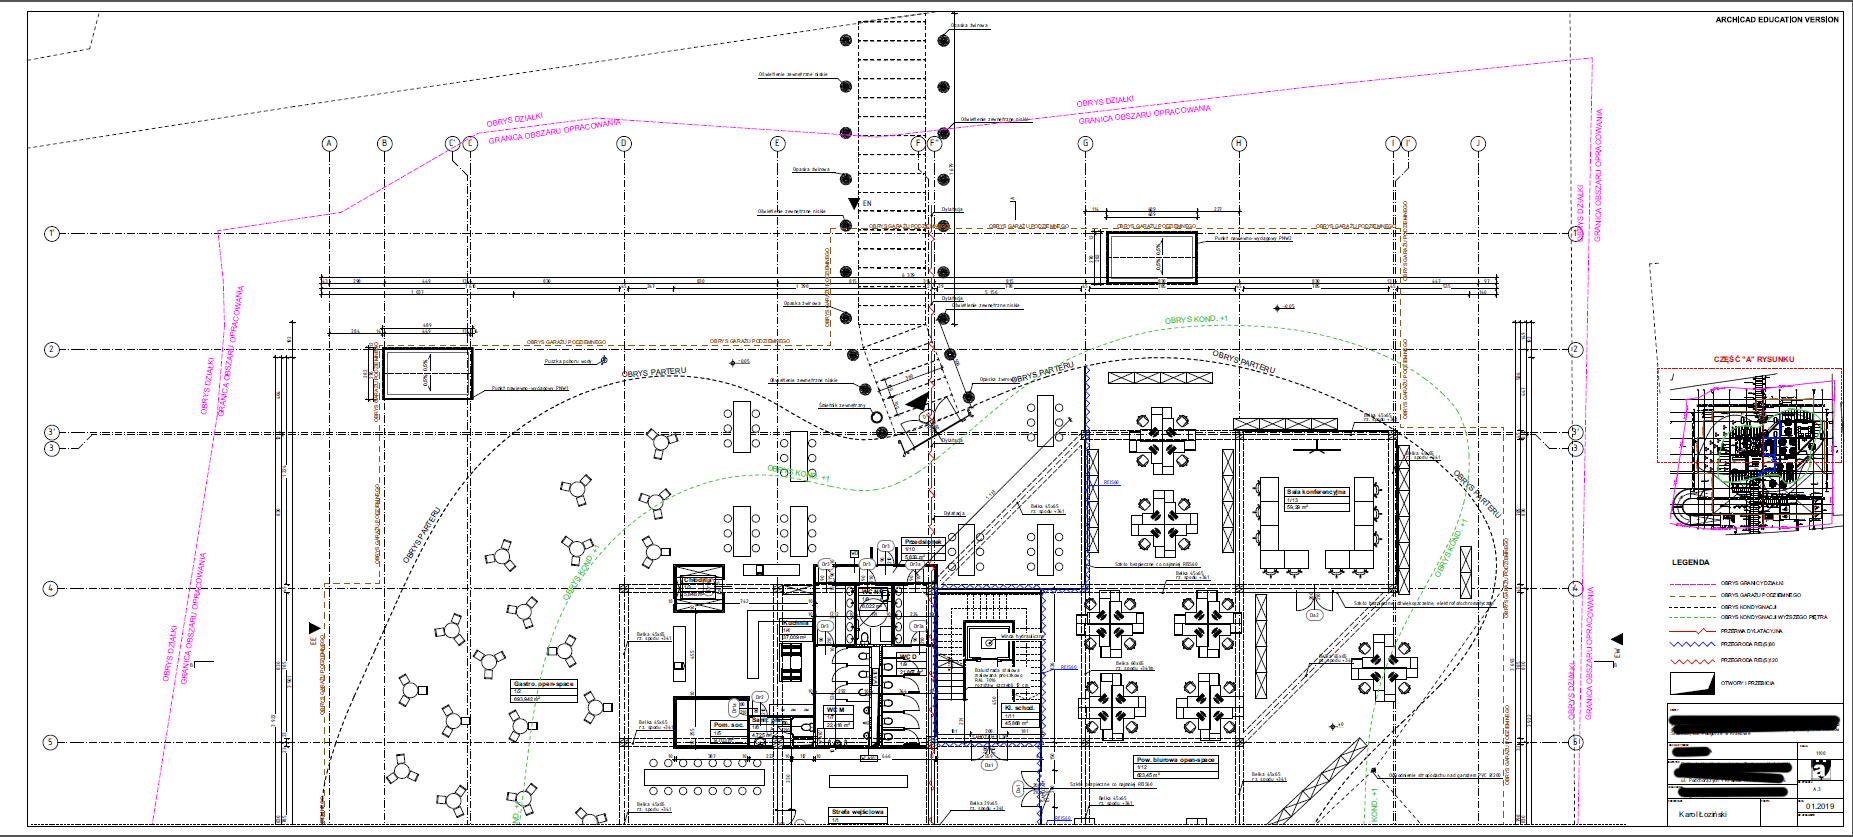
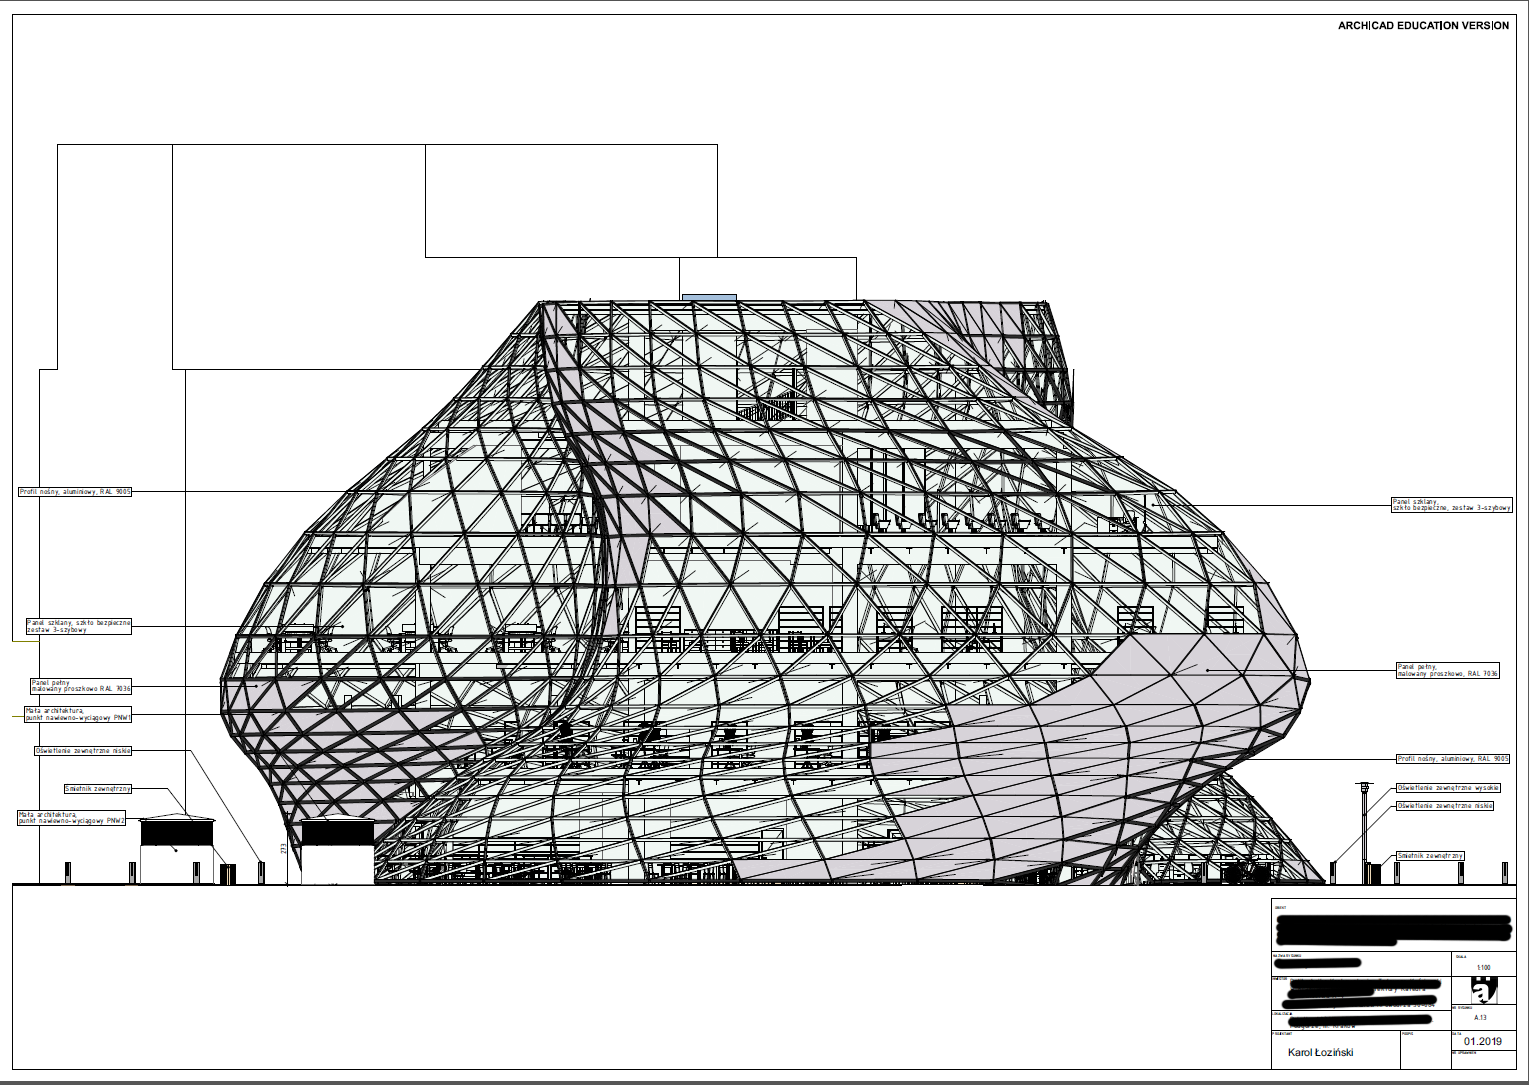
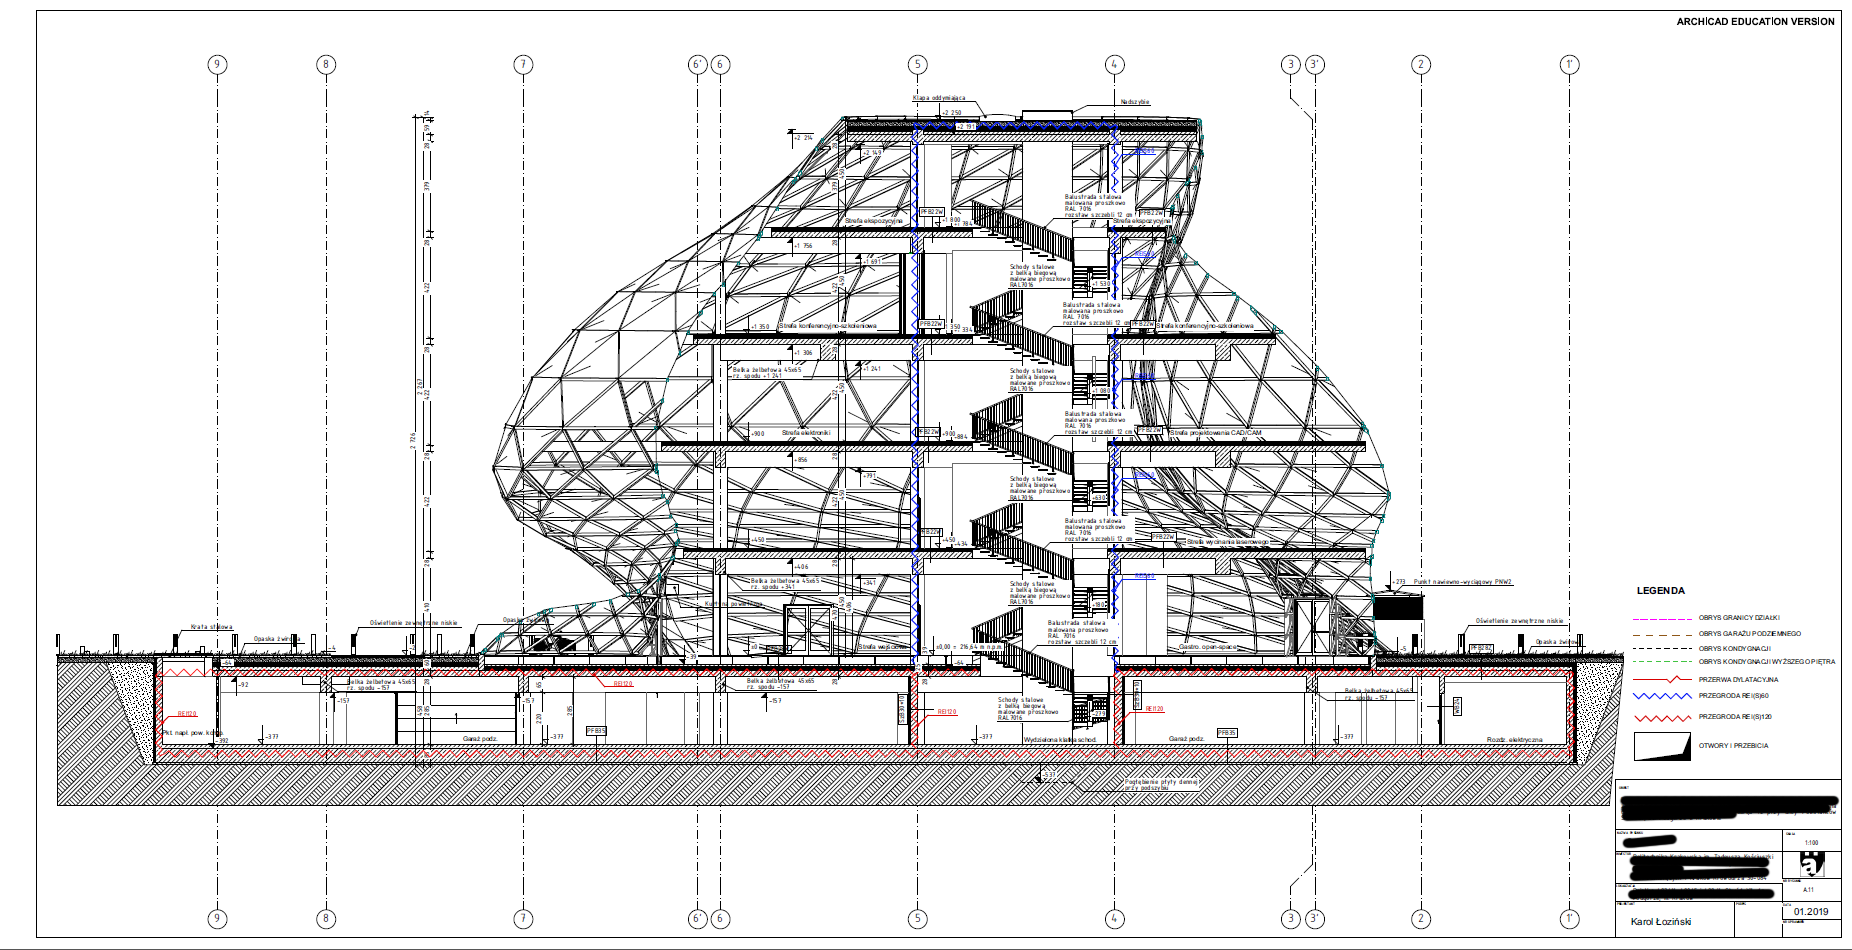
I have to say that seeing all of this made me proud at this point. But it was no time to rest. When I saw, that the design “sits in place” I started drawing technical drawings. And boy oh boy it was the sweeties thing that I’ve done. OF COURSE there were mistakes. Lots and lots of mistakes. For example not enough room for designed function or columns piercieng through facade. One or two clicks and DONE. I was able to reshape the whole bulding at this point, change the panels, the amount of them, the dimensions, sligltly move the facade to cover columns, scale the whole thing to fit the plot and the whole proces - calculating whole facade with given instructions - was done in seconds! Thats the BIM I was dreaming about! Thats the parametric design I heard about! And after a few days, drawings were done.

And after some tweeks the final visualizations came out.

And for the end - thats the photo of finished work.
At the very end I want to thank you all again. I could not do a single thing without your precious help!
If you want to know anything more about the process I’ll be pleased to answer and help you.
PS I’ll be designing my masters in one year and frankly - can’t wait to do something like this but BIGGER! And better